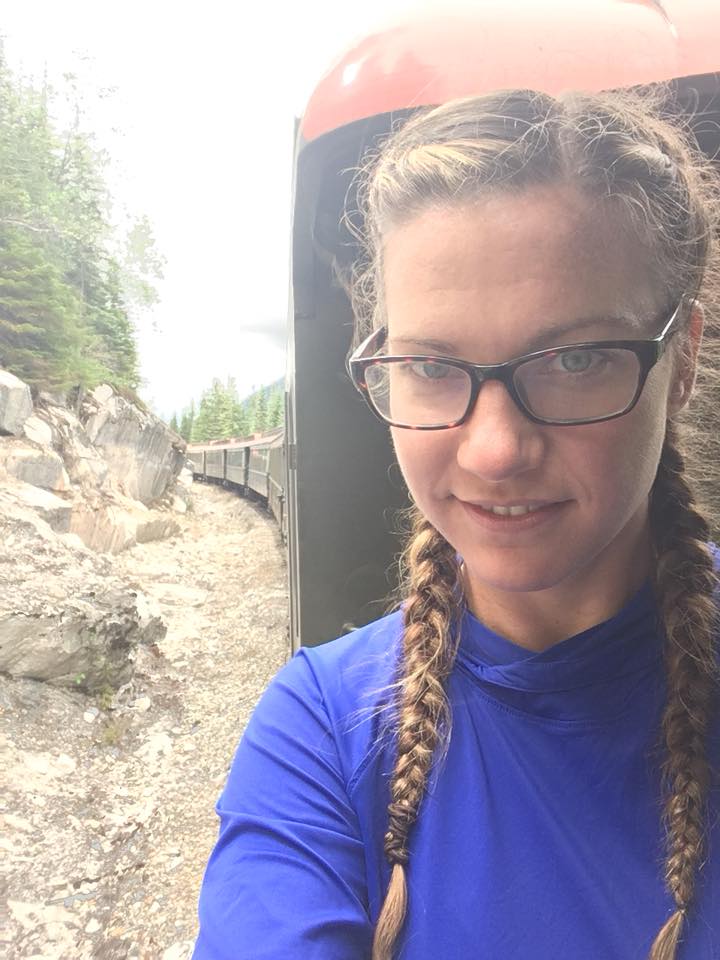
Having just spent six days in Glacier National Park in an often-overlooked section in the Two Medicine Region called Coal Creek/Nyack region, here is the trip report… also, here is my “Nyack Nyack” joke:
Nyack Nyack! Who’s there?
Hike. Hike who?
Huckleberries gleam,
In forest where bears roam free,
Wilderness delights!
Day 1 – Nyack Trail Head to Coal Creek Campground – 19.78km and 467m of elevation gain – moving time 4 hours and 50 minutes.
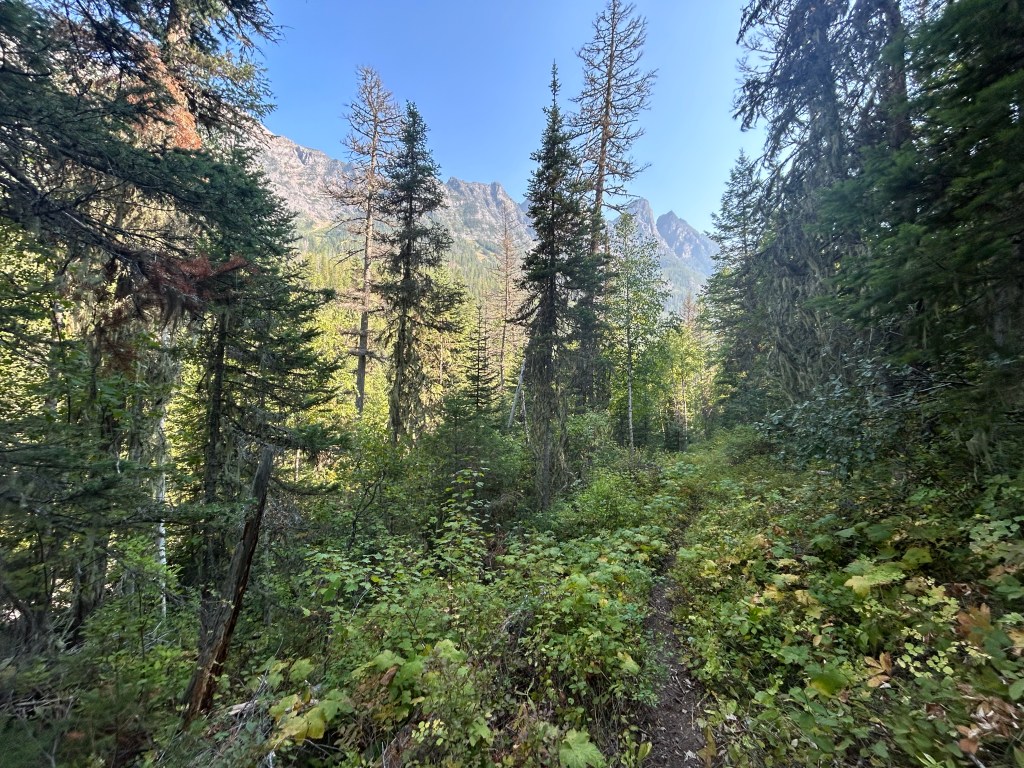
From the car parked at Nyack Trail head, we forged the Middle Fork Flathead River which was hip deep after several days of rain. The South Boundary Trail follows the river and appeared seldom used. It was quite overgrown and but was fairly easy to see through the brush. One we met up with the Coal Creek Trail and made our way to Coal Creek Campground. We saw no one!
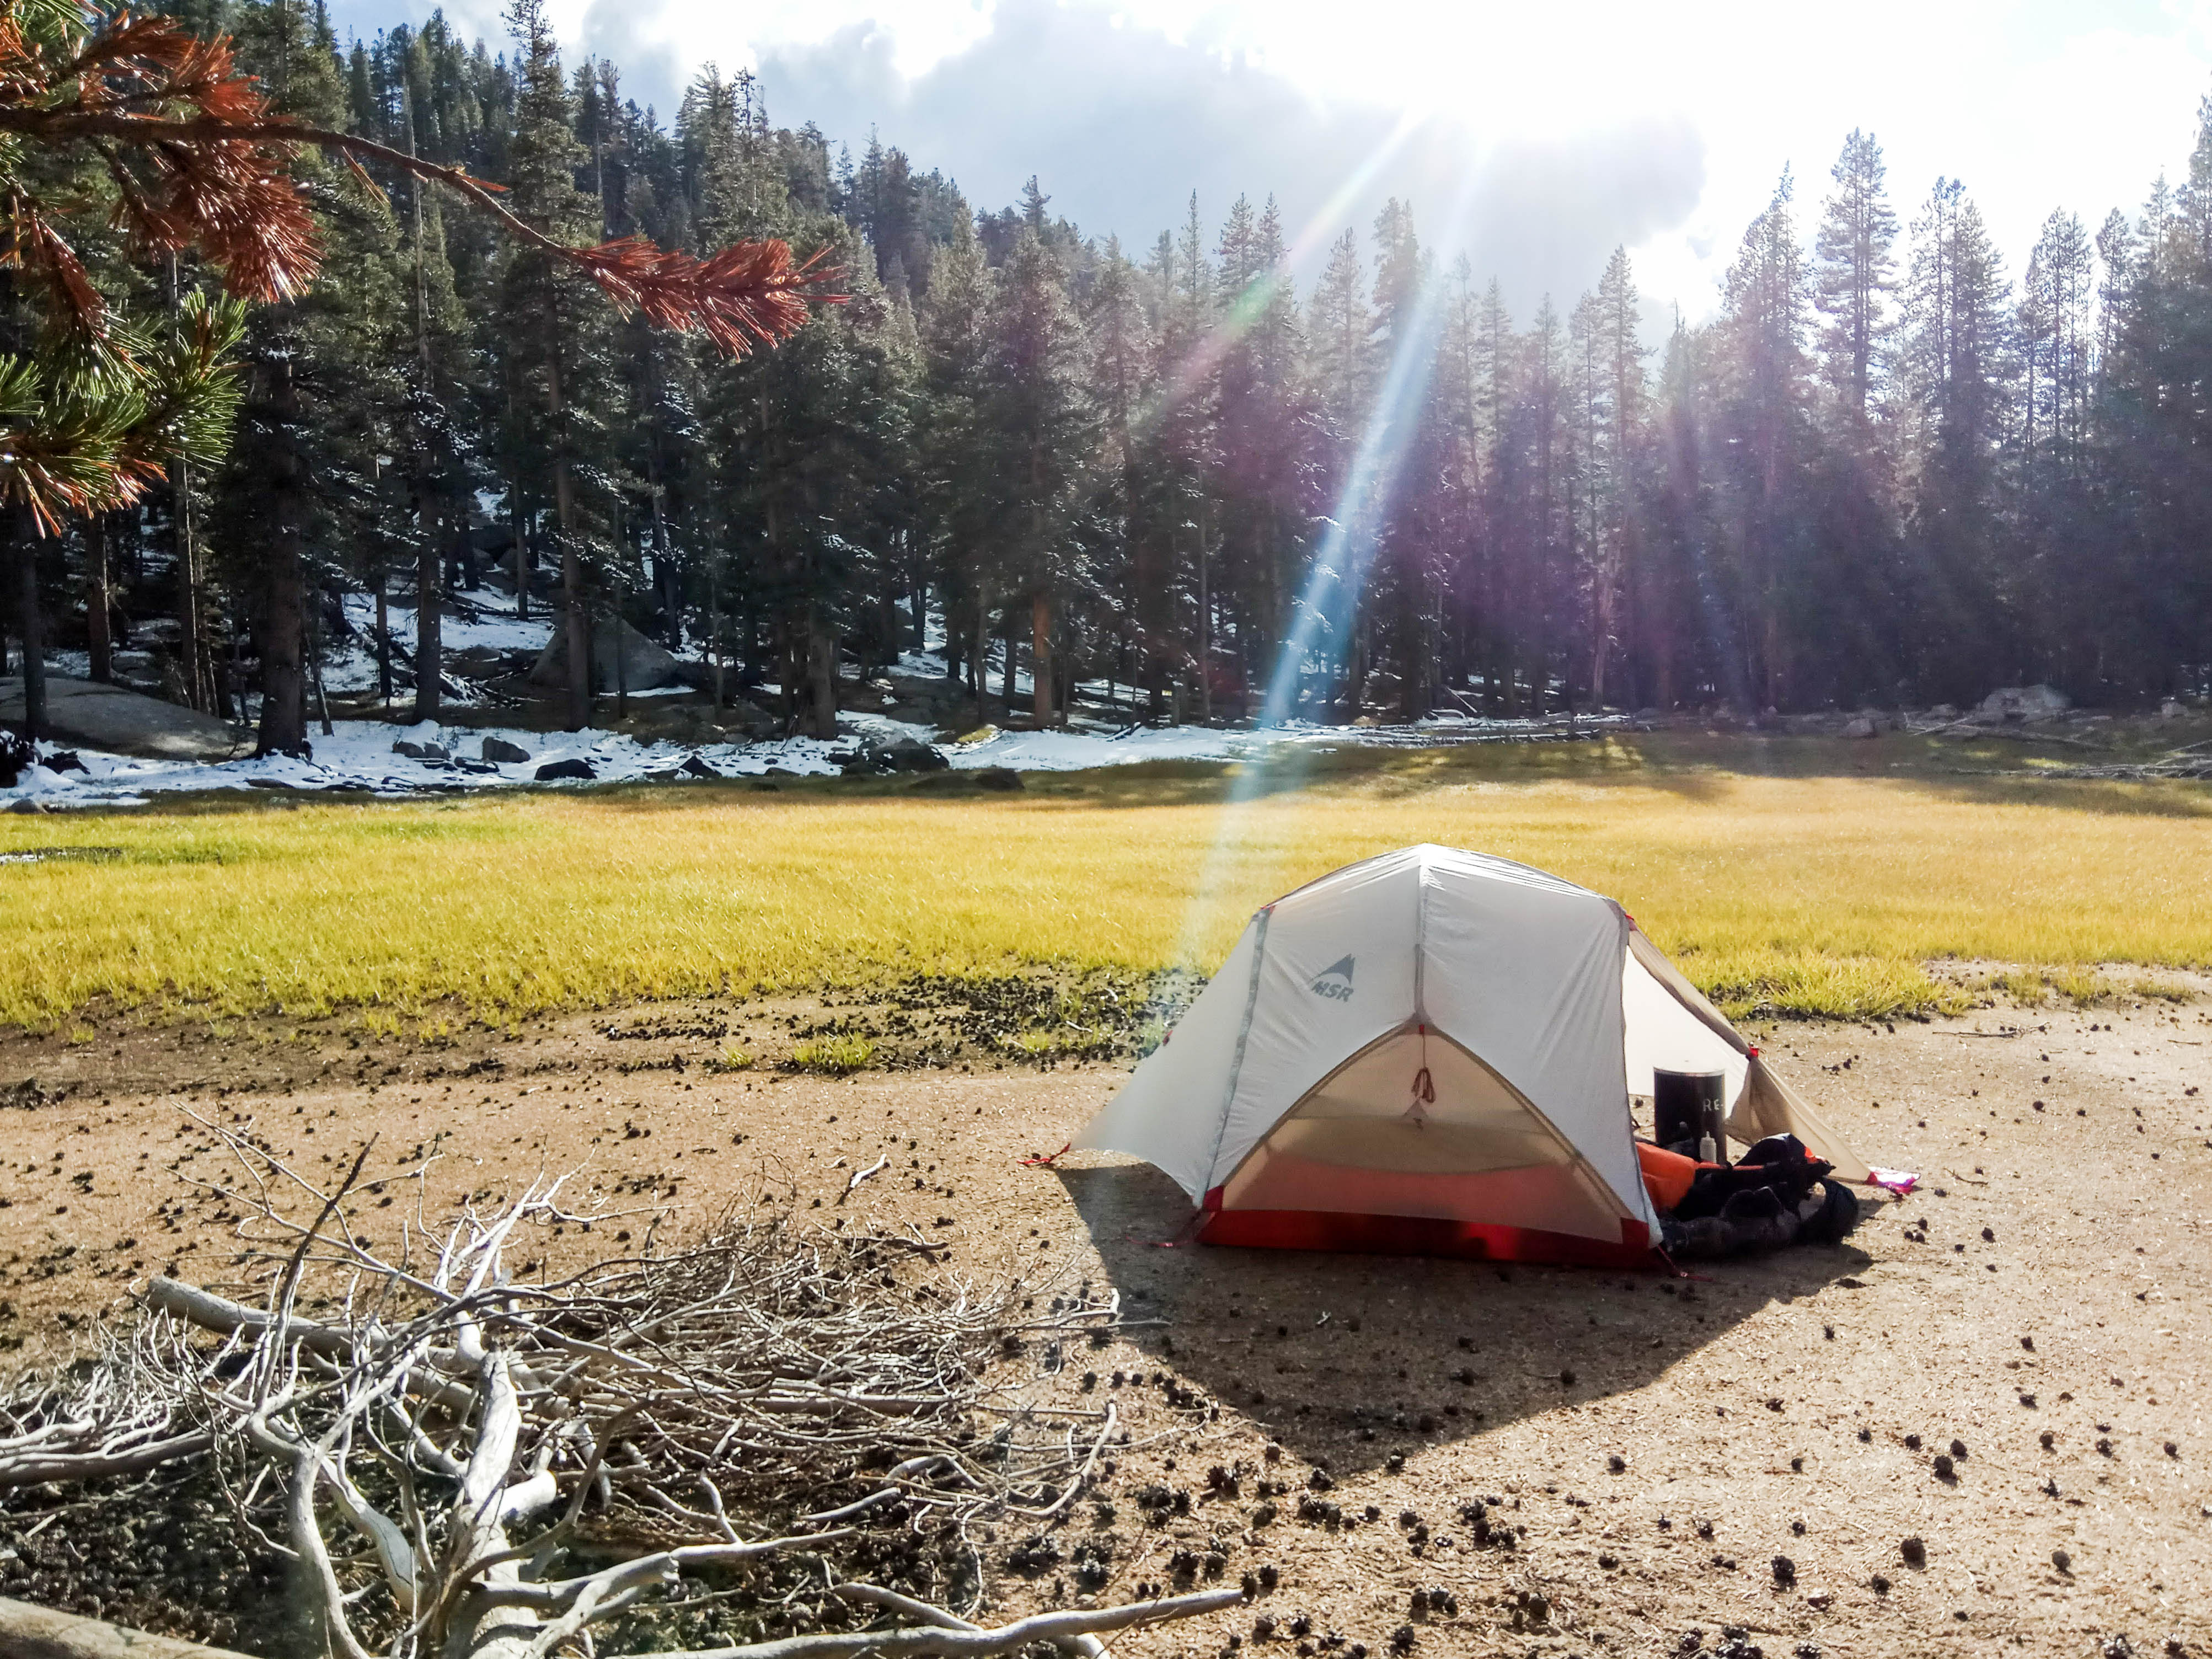
Not the middle fork river but one of the many stream crossings 🙂
Day 2 – Coal Creek Campground to Lower Park Creek Campground – 17.28km and 729m of elevation gain – moving time 5 hours and 26 minutes.
The first river crossing was slow going as the trail wasn’t very established after the water crossing. This area was an old burn and it appears the trail has been rerouted and doesn’t follow what the map says, so we spent an hour double checking maps, back tracking to the junction. This trail was the worst on the Park Creek side descending through a lot of deadfall and bushwhacking with no views. Many times, the brush was taller than us! We were welcomed to a glorious feast of huckleberries but at the detriment of them slashing up our legs. We saw one single person coming up the trail as we descended.
Day 3 – Lower Park Creek to Upper Park Creek Campground – 12.41km and 397m of elevation gain – moving time 3 hours and 6 minutes.
Easy rest day where we caught up on laundry. We slowly climbed the drainage and were greeted to more epic views and delicious huckleberries and thimbleberries. Lovely campsite by the creek and no one to be seen! We basked in the sun and relaxed.
Day 4 – Upper Park Creek Campground to No Name Lake Campground – 22.41km and 1263m of elevation gain – moving time 5 hours and 52 minutes.
Huge climb up and out of the drainage and over Two Medicine Pass. This climb had a ton of great views and as we made our way over Two Medicine Pass and received an amazing glimpse at the east side of the park. As we descended, we finally began to see all sorts of day hikers from the Two Medicine region – it was a bit of a culture shock! We made our way around the Two Medicine Lake South shore and hiked up to No Name Lake. This was one of my favourite campsites and we shared it with one other group. Stunning view and we heard some rock fall during the night.
Day 5 – No Name Lake Campground to Lower Nyack Campground – 37.63km and 1052m elevation gain – moving time 9 hours and 34 minutes.
Holy heck this was the money shot day; Starting with an amazing sunrise on the east side of the park Dawson Pass is next level! Stunning ridge walks (and some butt clenching heights for me!) We get off the day hiking/popular area and head over Cut Bank Pass which drops into the Nyack drainage. Cut Bank Pass is gnarly and as you drop into the bowl the trail was steep and hard to follow. It goes through an old burn and was very very hot. There appears to be a very new ranger cabin and some nice trail maintenance over some sections here. Eventually the burn ends, and the trail becomes brushy. We pushed hard to get to Lower Nyack Campground which does not appear to be used often. Long day but we felt rewarded. Unfortunately, this drainage is very hot and dry, so all the berries were spent. Not a single person was seen.
Day 6 – Lower Nyack to Car! – 10.03km and 140m of elevation gain – moving time 2 hours and 17 minutes
Spirits were high! Quick jaunt out with some more lovely bushwhacking as we meet back up with that South Boundary Trail. Crossed the Middle Fork Flathead River which was way lower than the 6 days earlier! What a beautiful experience I absolutely loved this lesser hiked section of the park. Super easy to get permits and absolutely no one around!
I have to say my Fenix 7S was my favourite piece of gear! I loved that during the Hike activity it would show the map with the distance to the next trail junction. This was *so* much easier to use than the Inreach (which I also had of course), and I was able to cross reference it easily with the Two Medicine paper maps.
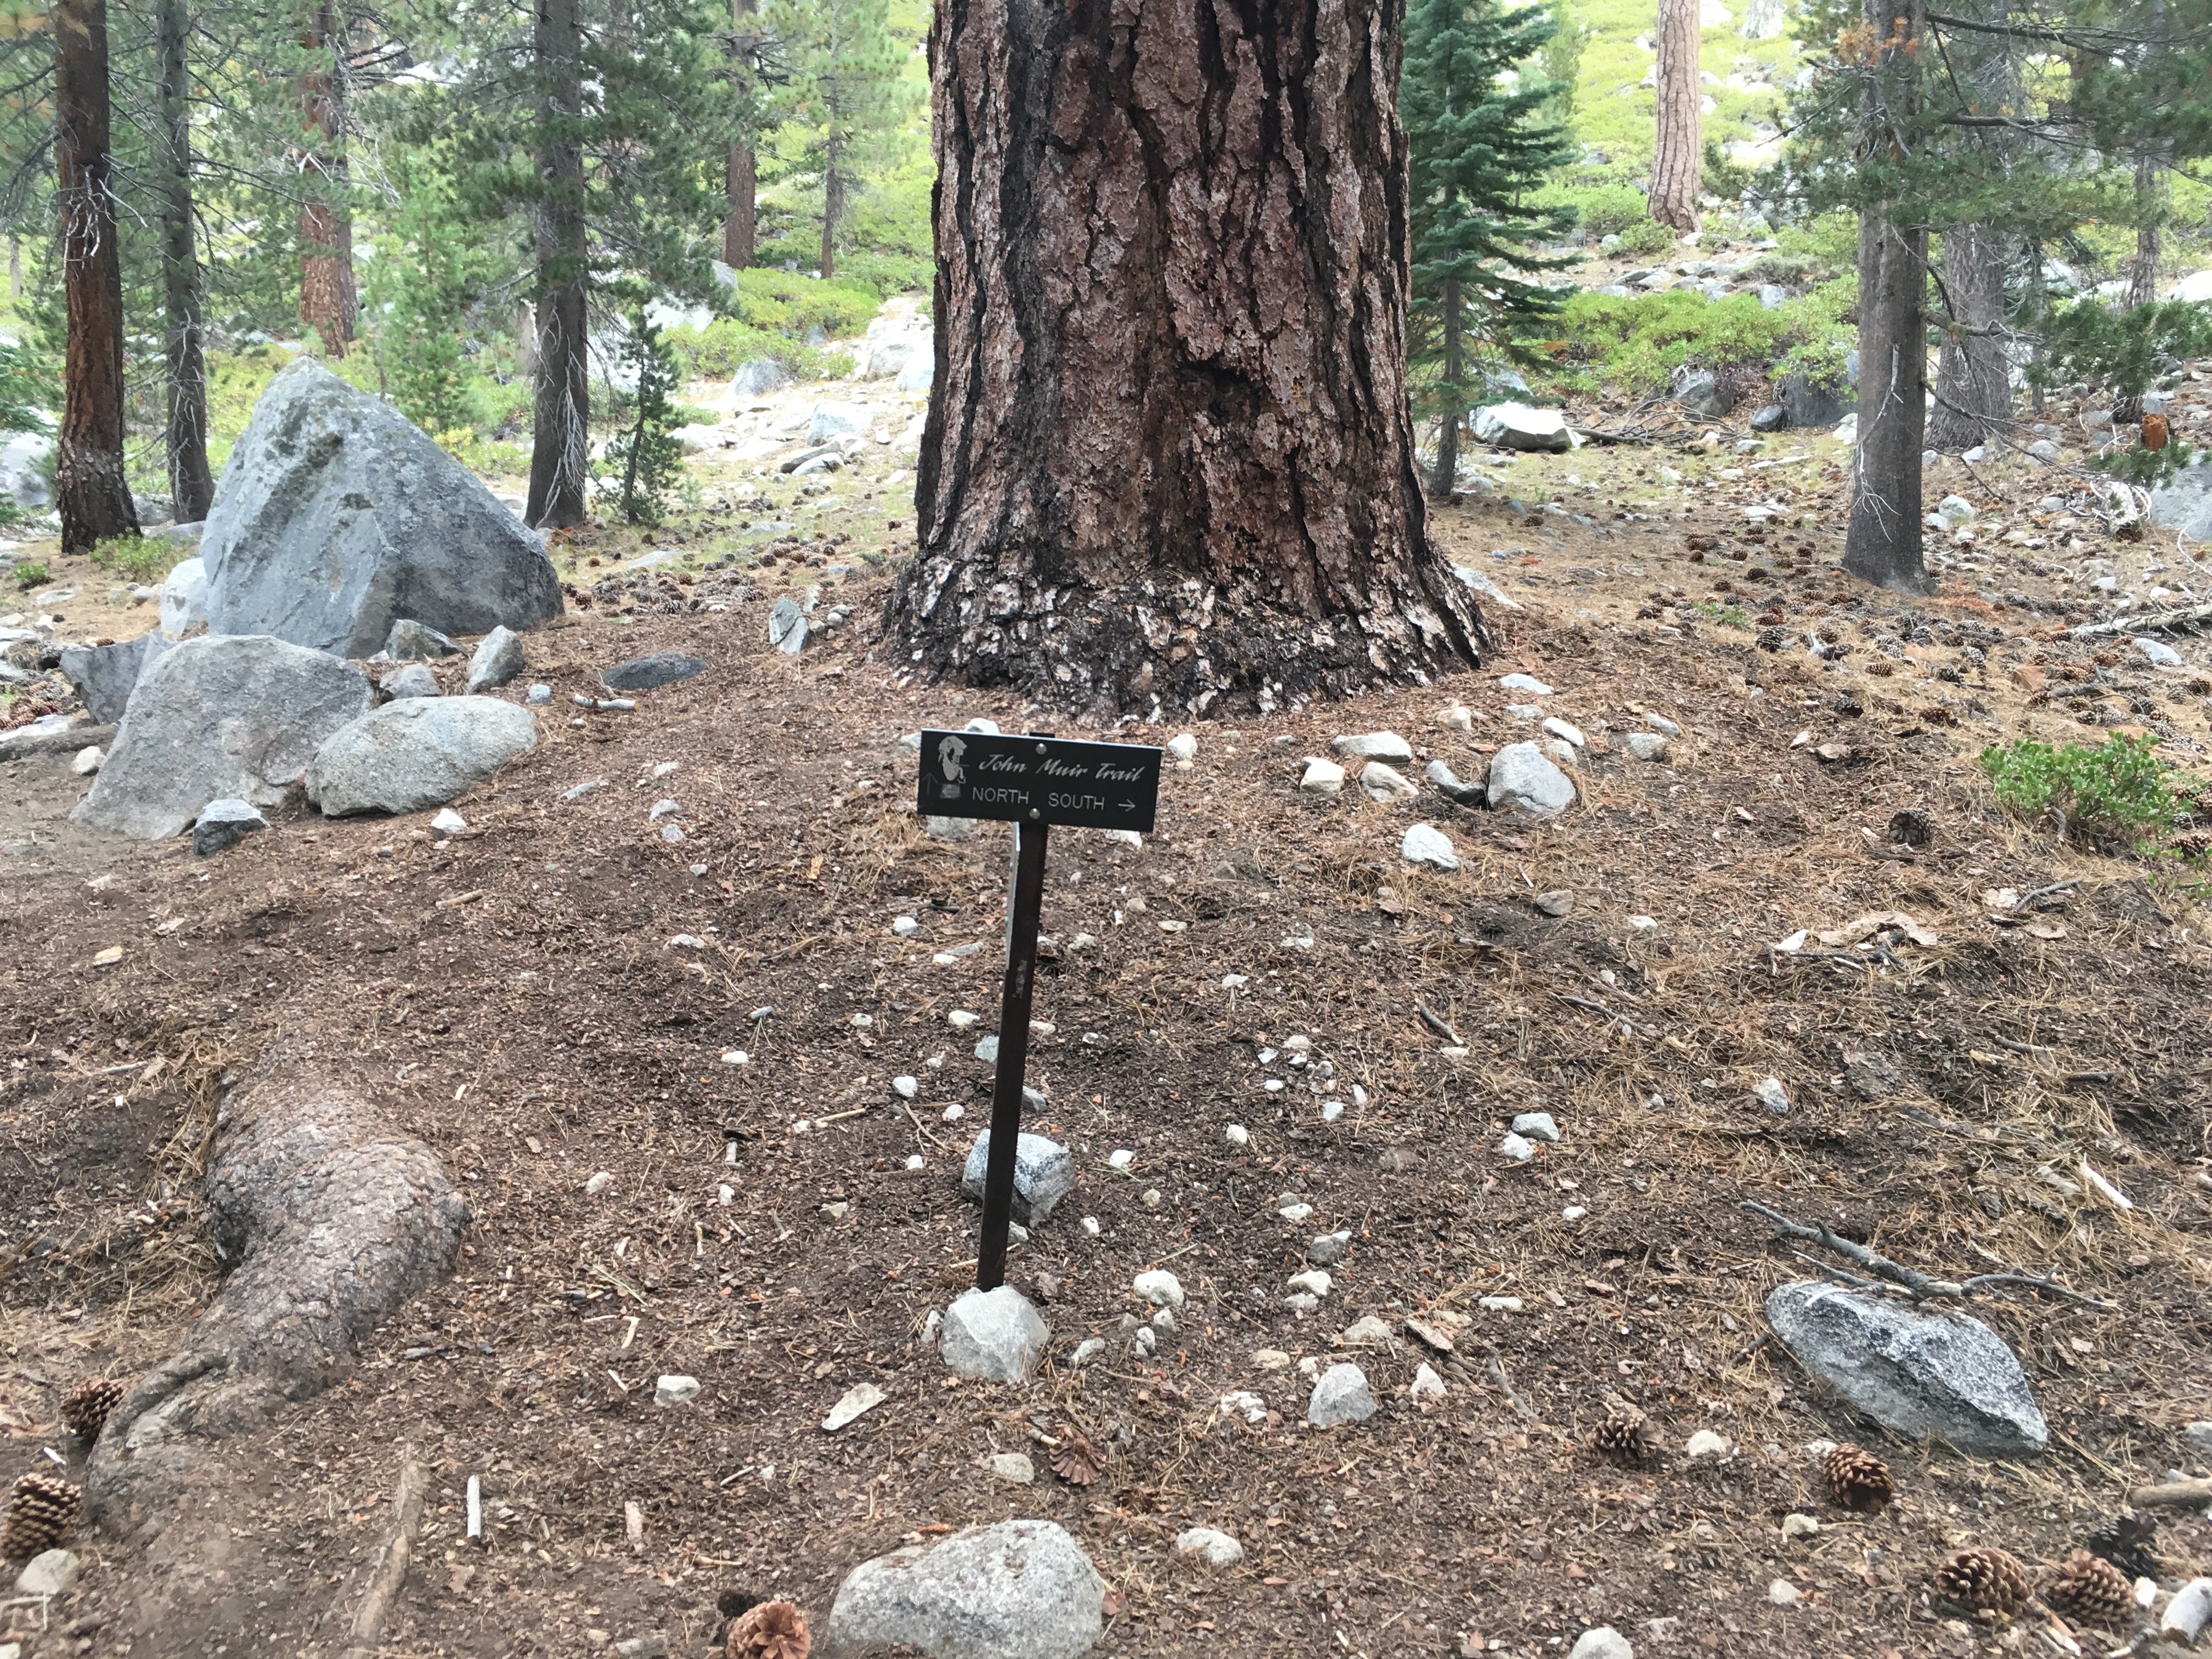
When I described this trip to my husband he dubbed this trek “The long way around the parking lot”, I call it the Medium Sexy Loop.
This trek starts at Road’s End in Sequoia King Canyon National Park starting on the North side of the parking lot, and completing 144km later on the South East side. Quite novel to say the least! The trek is dubbed as the Big SEKI loop, this is a shortened version (there are a few, I went with the middle in size option). Much info around the web can be found for the “SEKI Loop”.
I really enjoyed this loop and soloed it in 7 days. It has enough solitude on the early Copper Creek Trail, then a ton of socializing up on the JMT, and since it is a loop you don’t have to deal with logistics of getting too and from the trail head, or a boring out and back.
Next level goals – you can make this trek down past Whitney to Kern River and back across the HST through Bear Paw Meadow and out Bubbs Creek aka The Big SEKI Loop (googling this has lots of resources). This was my original goal but I had an awful cold for most of this trip and decided one week out in the wilderness was perfect.
The trek is harder than the JMT, in my opinion (some map reading/basic route finding when the trail gets a bit hard to follow on day two and three), but still I found it super easy from the mental perspective, so a perfect one to solo.
Forgot my spoon in my checked bag, oops… melted the end of my toothbrush handle into a flat spoon like shape. I guess that is a pro for not cutting off your toothbrush handle 😉
Probably not full on UL (Ultra Light), but solo traveling so had some extras. Loved my ULA Rain Kilt, that was a new addition to this trip. It made for a great “porch floor” next to my tent in the evenings.
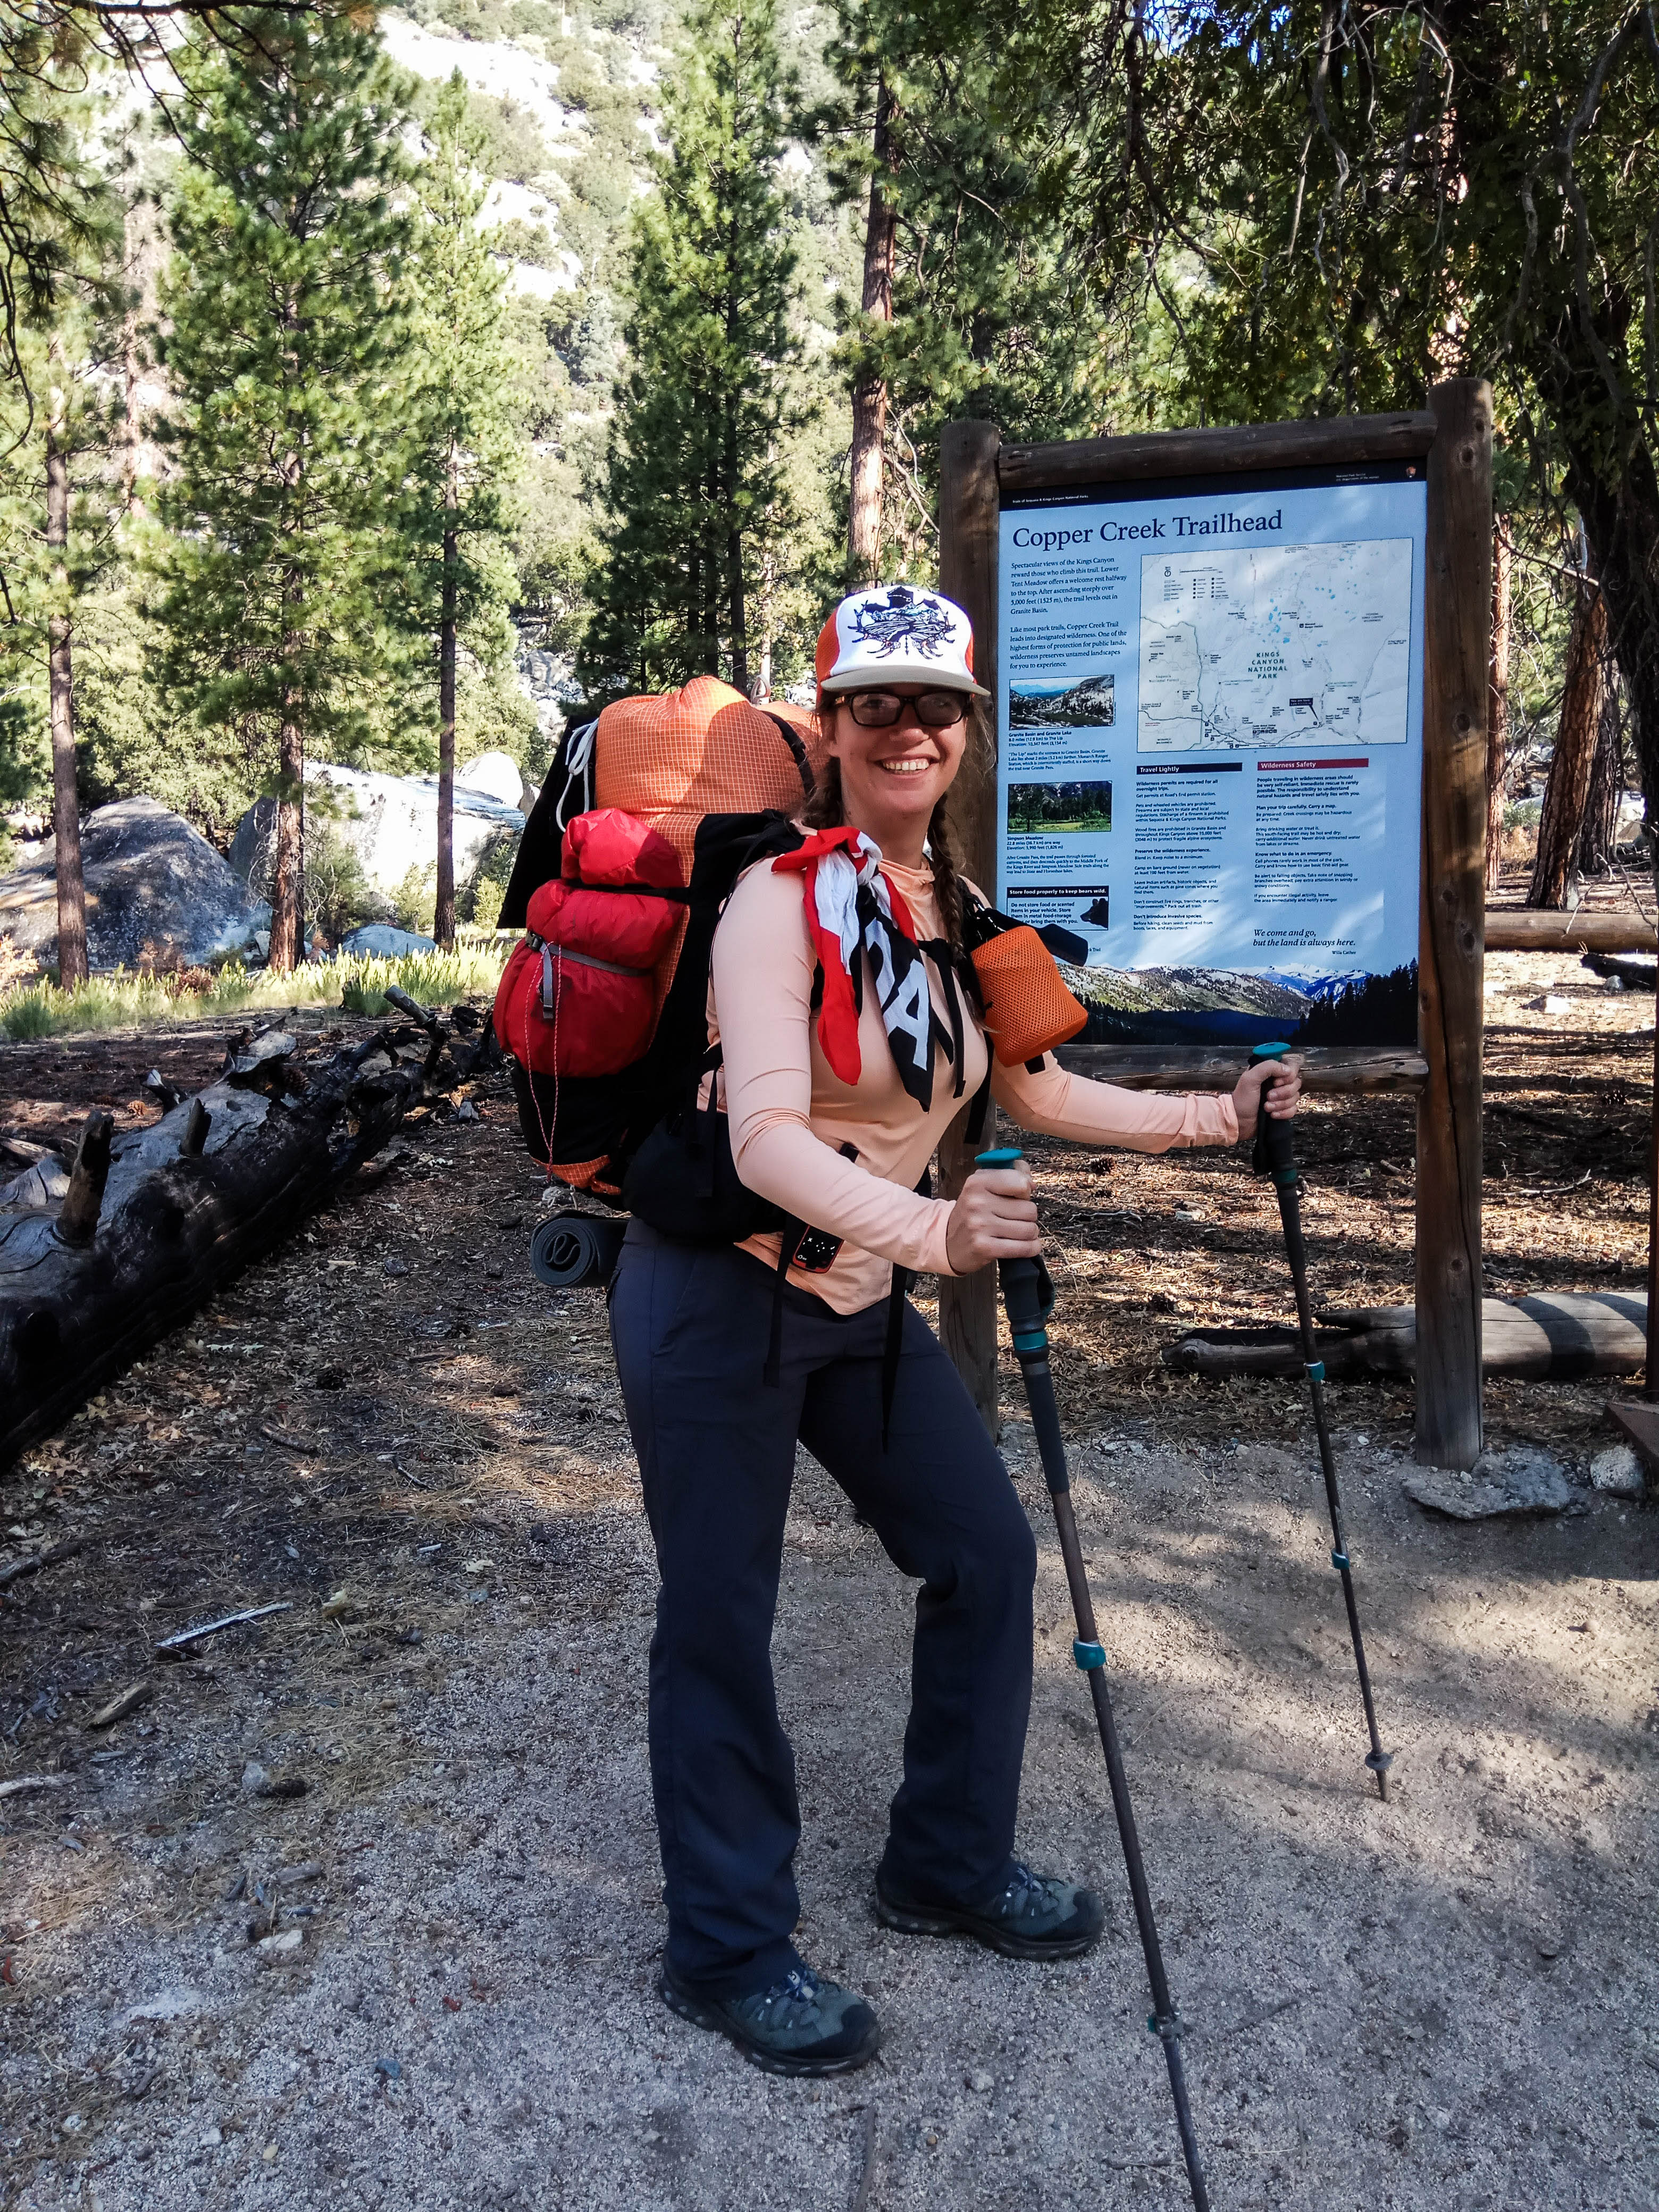
Day 1 – Copper Creek Trailhead to Granite Basin
Distance: 11 miles(17.7km)
Elevation Gain: 6700ft(2042m)
Day one is kind of the worst. Bad sleep from being in the campground the night before on Labour Day weekend, full pack weight, 50+ switch backs, hotter than hell, little shade or water. Up, up, up… Water was a bit more scarce this year than previous years so I actually ran out of water on the lip down into Granite Basin. Where I expected there to be water there wasn’t, but fortunately Granite Basin was only another 20 minutes and tons of water to be found :). I recommend 2L from the water source on the map on the way up, until you are in Granite Basin.
The view into Granite Basin – nice to see some water!
I found a secluded camp on a dusty patch near the lake, and it felt amazing to soak my feet in the water. The location felt super private but I did see a guy in the morning on the other side of the lake. Woke up to three deer walking through camp, not bad for day one!
Home sweet home at Granite Basin
Day 2 – Granite Basin to Simpson’s Meadow
Distance: 14 miles (22.5km)
Elevation Loss: 4700ft(1430m)
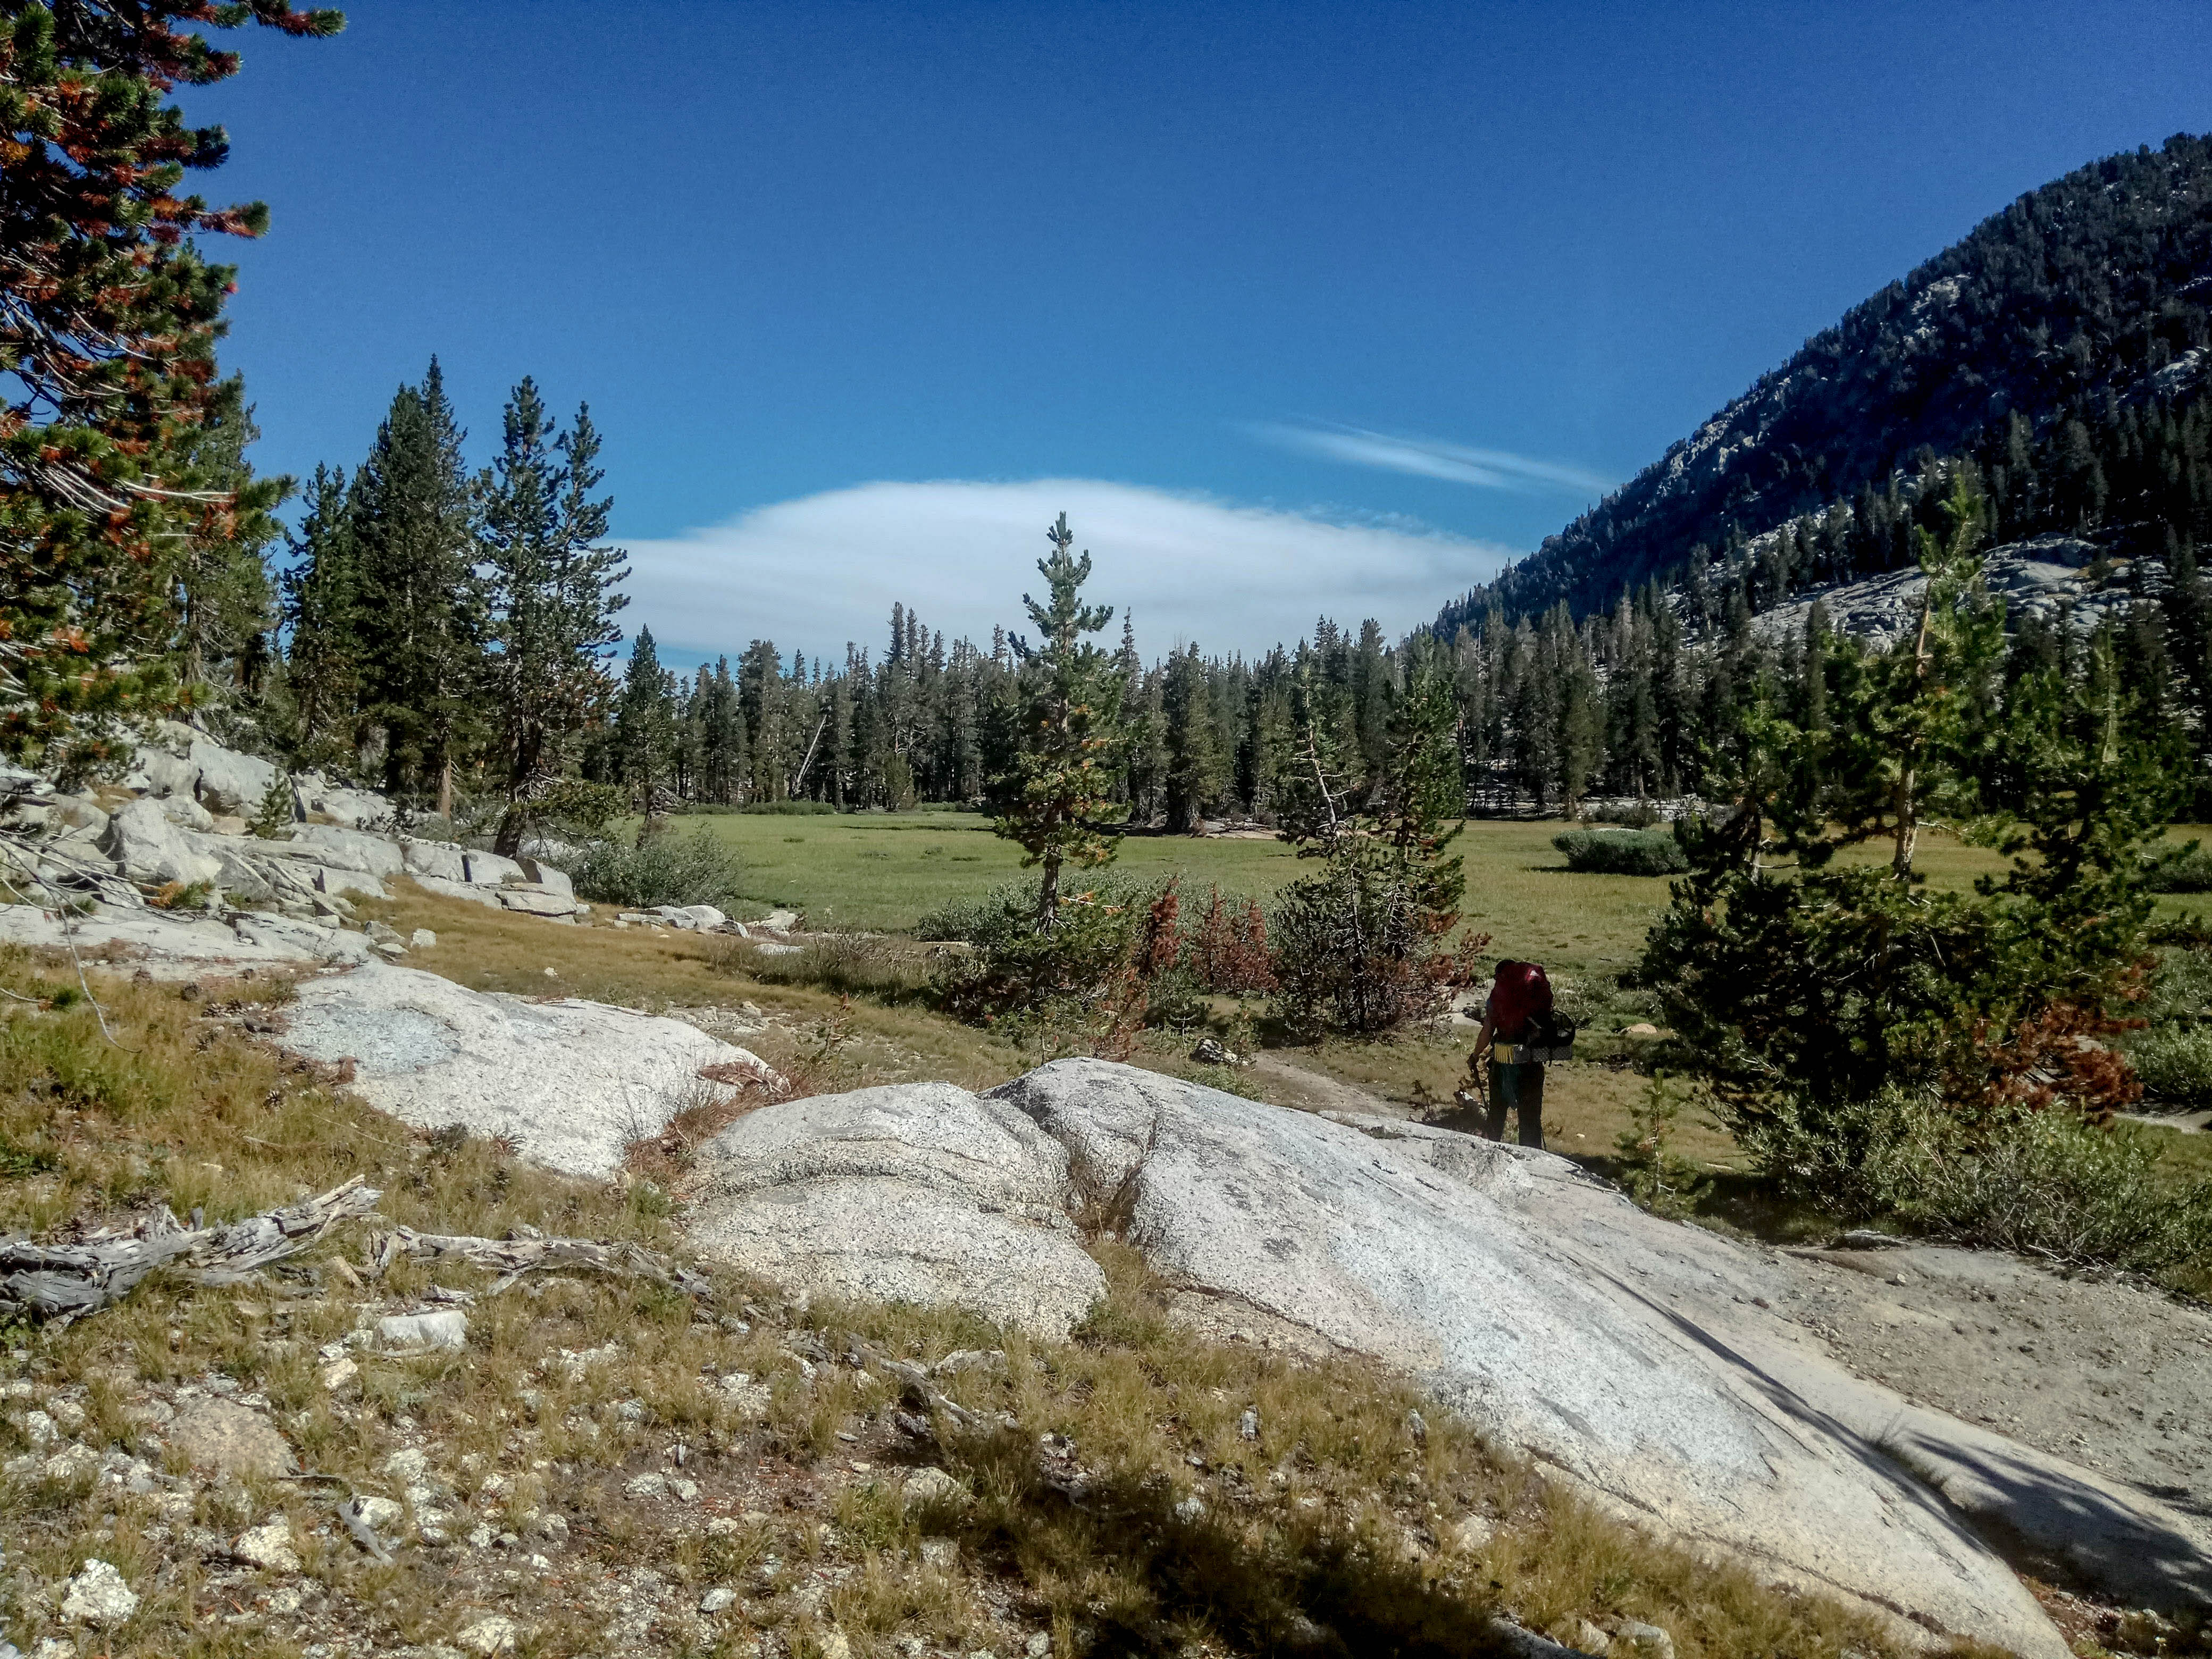
Day two was beautiful. Had a spring in my step, made it over Granite Pass fairly early, it’s a super easy pass, and down through Lake of the Fallen Moon area which is one of my favourite areas on the trail. Sunbeams like to peer through these small meadows and there are almost no people in this part of the park.
Spring in my step going through these trails
Crossed the Middle Fork Dougherty Creek which last year I took a spur trail just before and was off trail for a good 45 minutes – this year it seemed so obvious… Ran into three people coming out from State Lakes which was nice to have some human interactions with, only ones of the day!
Made it down “The Bitch” which is what the switch backs are called in the Kings Canyon Pack Guide… many many switch backs and 4000+ feet of down down down – you get here in the early afternoon and it feels like you are so close to Simpson Meadow but this section seems to drag. I cursed the pack gates as I am not very big and had a hard time opening and closing them.
Oh how I loathe you pack animal gates – you are heavier and more unruly than you look!
Made it past Simpson Meadow – note it is not signed and there are a few spur trails through the meadow. I hugged the right one that follows the granite rock slope and that is the one that is correct. I assume the other ones go to stock camps. I hiked about half mile or so past Simpson Meadow and found where the river was fairly close to the trail and setup camp.
This is such a bomber of a wee tent!
Wandering through the woods near camp there was an old drift fence in the trees, so I guess this had been setup a bit more in the past. I had to tie a guy line to my pot to collect water, as the bank was about a four feet steep drop to the river but it was fine. Quiet night here, no wildlife or people seen, however a big storm rolled in early so I just had a bars for dinner and it was a bit spooky.
What a way to start your morning
Day 3 – Simpson’s Meadow to Glacier Creek
Distance: 12.6 miles (20.2km)
Elevation Gain: 3000ft(914m)
Day three was also one of my favourite days. I had a bit of apprehension because I did this section of trail last year and found it to be a bit of a challenge. The trail itself isn’t particularly long or difficult elevation wise, but it is not well maintained and gets quite overgrown. I had heard there was a washout somewhere past Cartridge Creek, and last year was a huge snow pack year and the Palisade Creek Crossing was challenging. Though so far the water sources were pretty scarce, so that worry was quickly squashed!
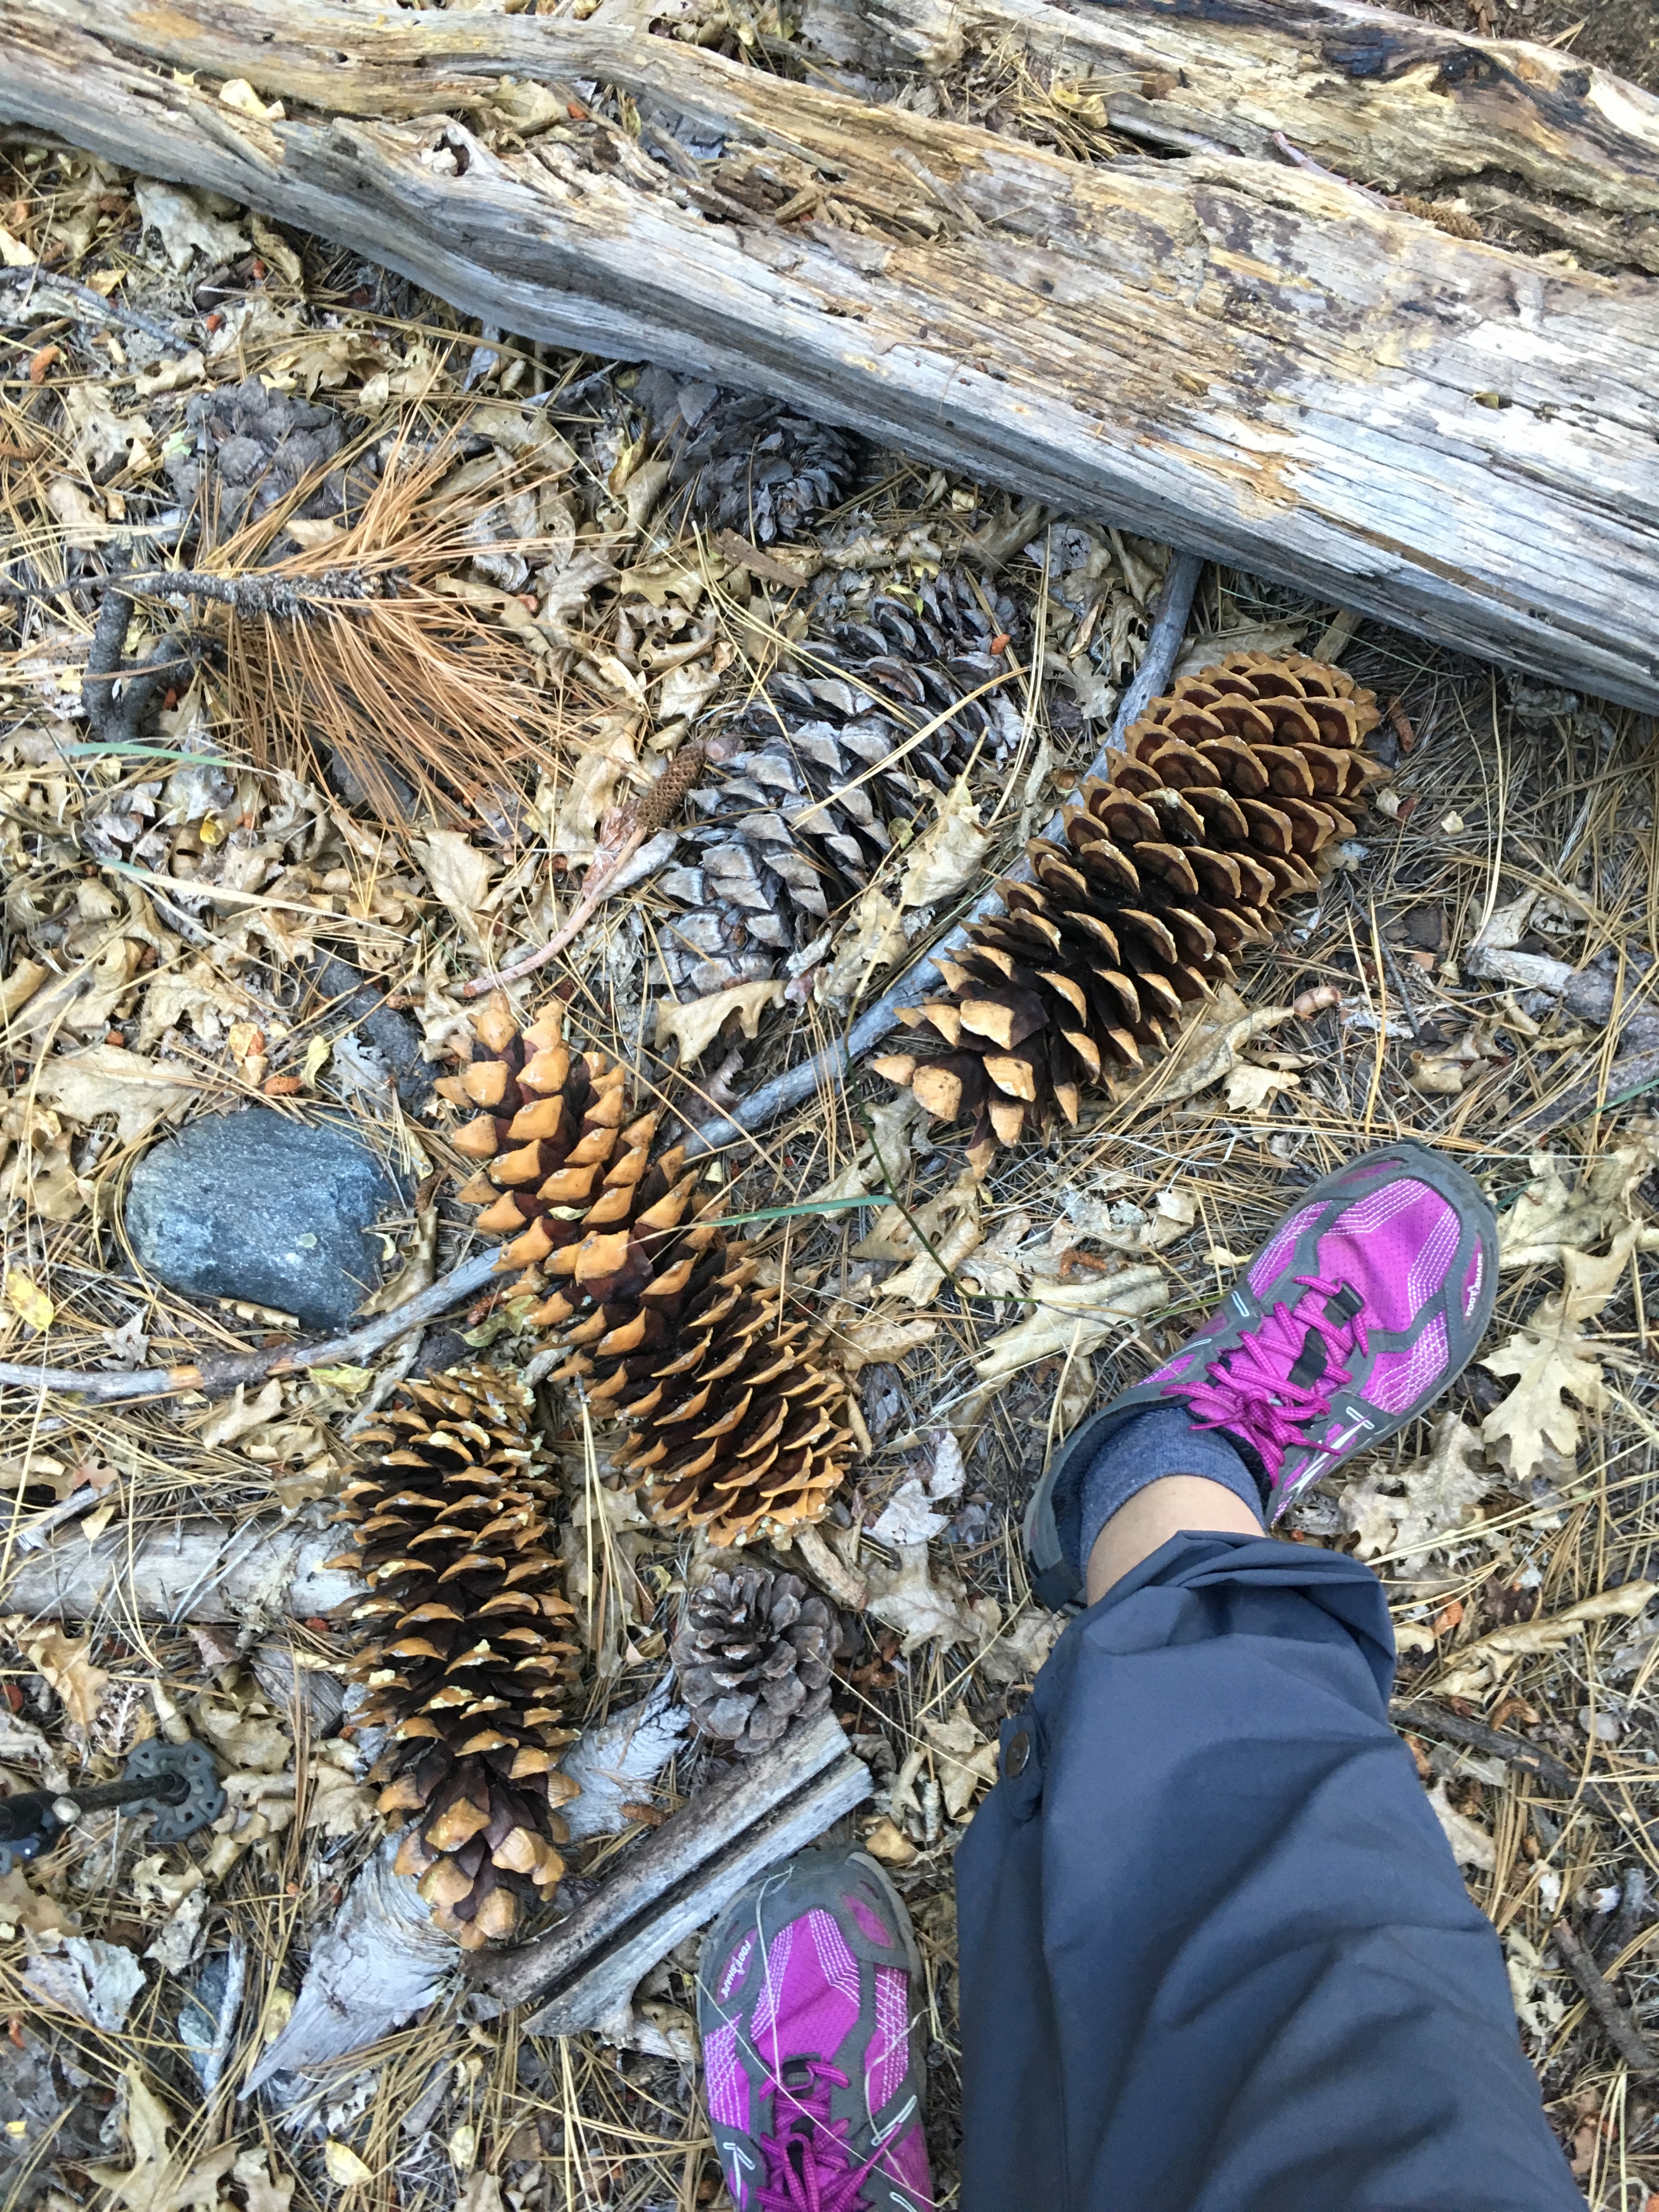
Do these pine cones make my feet look small?
Climbed up and and up, this section is filled with grand views, hanging meadows, and stunning granite vistas. About half a mile before Devil’s Washbowl I was in extremely over grown brush and making the occasional bear call. All of a sudden I hear crunch crunch above me just off trail and sure enough about four feet away, a huge healthy black bear and I make eye contact. This was the closest I have ever been to a bear (even living in bear country). I talked to the bear calmly, “Oh why hello black bear, nice to see you today…”. He looked at me as if to say “what the fuck are you”, and slowly ambled off. It was a great experience overall and he seemed to have a healthy disinterest in humans.
Squint you may see a bear!
Devil’s Washbowl up to Cartridge Creek was stunning and uneventful, then I hit the washout about 1-2 miles before the JMT and there were actually trail crew working on it. One of the crew members mentioned that it won’t be fixed this year, but from what I could see they were doing a great job. I was able to just hike up the side of the washout 4-5 feet then scramble across, it really was no big deal. Up the rest of the trail to Palisade Creek the crossing was super easy this year. Managed to rock hop 90% of the way then had to take two above the knee steps into the water to get over to the bank. Dried out, had lunch it was only 1:30PM!
Why hello!
Feeling quite pleased with myself, it was now time to hit the major freeway that is the JMT and prepare to get overwhelmed by all the socializing. I hiked the remainder of the evening to Glacier Creek, just before the Golden Staircase. In hindsight I should have just busted my ass another hour up to Palisade Lakes, would have made for a more enjoyable day four.
Sensory overload on the JMT!
Day 4 – Glacier Creek to South Fork King River
Distance: 12.2 miles (19.6km)
Elevation: Approximately 3000ft to Mather’s Pass (914m)
Golden Staircase views!
Day four was a bit of a slog for me. Golden Staircase flew by but the trek to Mather’s Pass felt unending. There was some dicey weather rolling in and I really didn’t want to be caught out high on the pass. I kept questioning if I should keep moving up the pass or hunker for a bit, finding solace in the cheese snacks I picked up at the SEKI store at Road’s End as an impromptu buy, I decided to keep on.
I am actually on the moon here
The trail after Mather’s shlepped through the forest down down down, and it started to rain. I found a campsite down low by the South Fork King River and ended my day early around 3:30 PM. This area was a bit sad as I reminisced the fact that a lovely young PCT’er passed away earlier in the year at one of the river crossings.
Once the rain finally let up, it turned out to be a fun night as I met some awesome folks from the UK and US, built a fire and we had some laughs.
Hiding during the rain, love this Park’s Canada buff!
Day 5 – South Fork King River to 1.5 miles before Dollar Lake
Distance: 14.3 miles (23km)
Elevation: Approximately 2000ft to Pinchot Pass (600m)
Pinchot my favourite pass – what a breeze!
Day five was fantastic, I loved Pinchot Pass! It wasn’t a slog and I had great views! The other side of Pinchot was never ending lunar landscape of arid terrain. I even met the superintendent of the Park who took my picture for me at the top of the pass, we had a nice chat and shared a snack. I took a very leisure day (the kilometers don’t show it but it truly was a saunter) and just slowly trekked through enjoying the sights. I made it past the suspension bridge and saw the zoo that is that first campsite with a lot of familiar faces over the last couple days. I decided to keep going as I really don’t like the busy areas with the toilet paper messes and the loudness in nature.
My stretch goal was to make Dollar Lake, but I got lazy and decided to pick a kind of shitty camp spot just above this wooded meadow (which in hindsight had nicer camp spots but I was too lazy to walk back down the way I came up because that just feels wrong!).
The nature, of nature.
This camp spot had no water, and was on mostly granite so pitching the tent was a bit trickier but I was getting much better at it. Another bar only night, but it was peaceful and a deer roamed through camp right before I went to bed.
Day 6 – 1.5 miles before Dollar Lake to Junction Meadow (Lower Rae Lake Loop)
Distance: 12.5 miles (20km)
Elevation: Approximately 2500ft to Glenn Pass (762m)
Day six, Rae Lakes are gorgeous and a great place to have second breakfast 🙂 Climbed up Glenn Pass, which I felt was a more mentally challenging than Mather’s Pass mostly due to the fact that you can see everyone on top of the pass and they look like ants the whole damn time.
So nobby!
This picture gives me PTSD – the people are up there, the size of 1px x 1px!
I have a mental ‘game’ where I tell myself I can take a drink of water every 5 or 10 switch backs (depending on how exhausted or thirsty I am, and barring how much water I have at the time). That game definitely helped me on this pass!
Once over the pass down and back into the woods towards Charlotte Lake, the trail crews were doing some blasting. aI was fortunate to be the last hiker through before the blast so I didn’t have to wait 30 minutes! Phewf!! I wish I had spent some time exploring Charlotte Lake and side trail in hindsight as that area was gorgeous and I felt a bit rushed.
Stunning sounds of water!
Finally veered off on the Bubbs Creek Trail at Lower Vidette Meadow and said goodbye to the John Muir Trail. Down towards Junction Meadow, to the left there is a fork to go to East Lake, there are some great camp sites near the river. The river crossing itself looked a bit gnarly however some people were crossing upstream. Apparently the other side is where the bear bin is located, but if you have a bear can it is irrelevant.
If you want to push on a little further the next good sites are around Charlotte Creek another two miles down hill.
This night was a sweet campsite as I was first to arrive. Also some good company with the two Steve’s who were brother in laws were there. I had met the one Steve earlier in the day on the other side of Glenn Pass, and we had chatted and had a good laugh. This evening we all ate dinner together. Steve 1 was a song writer/poet and rapped me an amazing song about hiking, it sounds cheesy but it was the coolest fucking thing I had heard all trip and was legit pro. Honestly I wish I had recorded it!
Curious what this sounded like when these rocks landed here!
Day 7 – Junction Meadow to Roads End
Distance: 11.5 miles (18km)
Elevation: Back down to 5000ft from around 7000ft
I woke up at five AM with excitement for an upcoming shower today and broke camp by 6am. I loved walking down Bubbs Creek Canyon, the grade was easy. I saw six trail runners with day packs coming up the trail, those guys are hardcore – curious if they were doing Rae’s Lake Loop?! Passed through the Bubbs Creek Fire burn zone from a fire earlier in the summer. Right as I finished this I saw (no offense bear), this ugly, scrawny, scrappy adolescent bear. He had zero interest in moving off the trail and I wasn’t sure if he still had a momma bear near by or if he was on his own – tween bear… I was yelling at the bear and backed up slowly. He gave zero shits about me and went right on foraging. Finally after 15 minutes he fucked off, and I was able to move on. I mentioned it to a ranger that this bear might need a hazing… and the ranger seemed to know the culprit.
The view of civilization down there (and showers)!
Down some last sets of switch backs the midges became annoying – first time on the trip that bugs were… bugging me. Finally, the long flats back to Roads End with all the day hikers passing you, it’s only 1-2 miles but feels like it goes on forever… I just want that damn shower!! (Talk about a motivation). Exited around 1PM not a bad 18km downhill haul! Showers ended up being free for some unknown reason so I was able to take as long as I wanted – talk about luxury!!
I am surprised these people got close enough to me to take a picture.
Woo hoo loop completed! Hope this was mildly interesting 🙂 Happy Hiking.
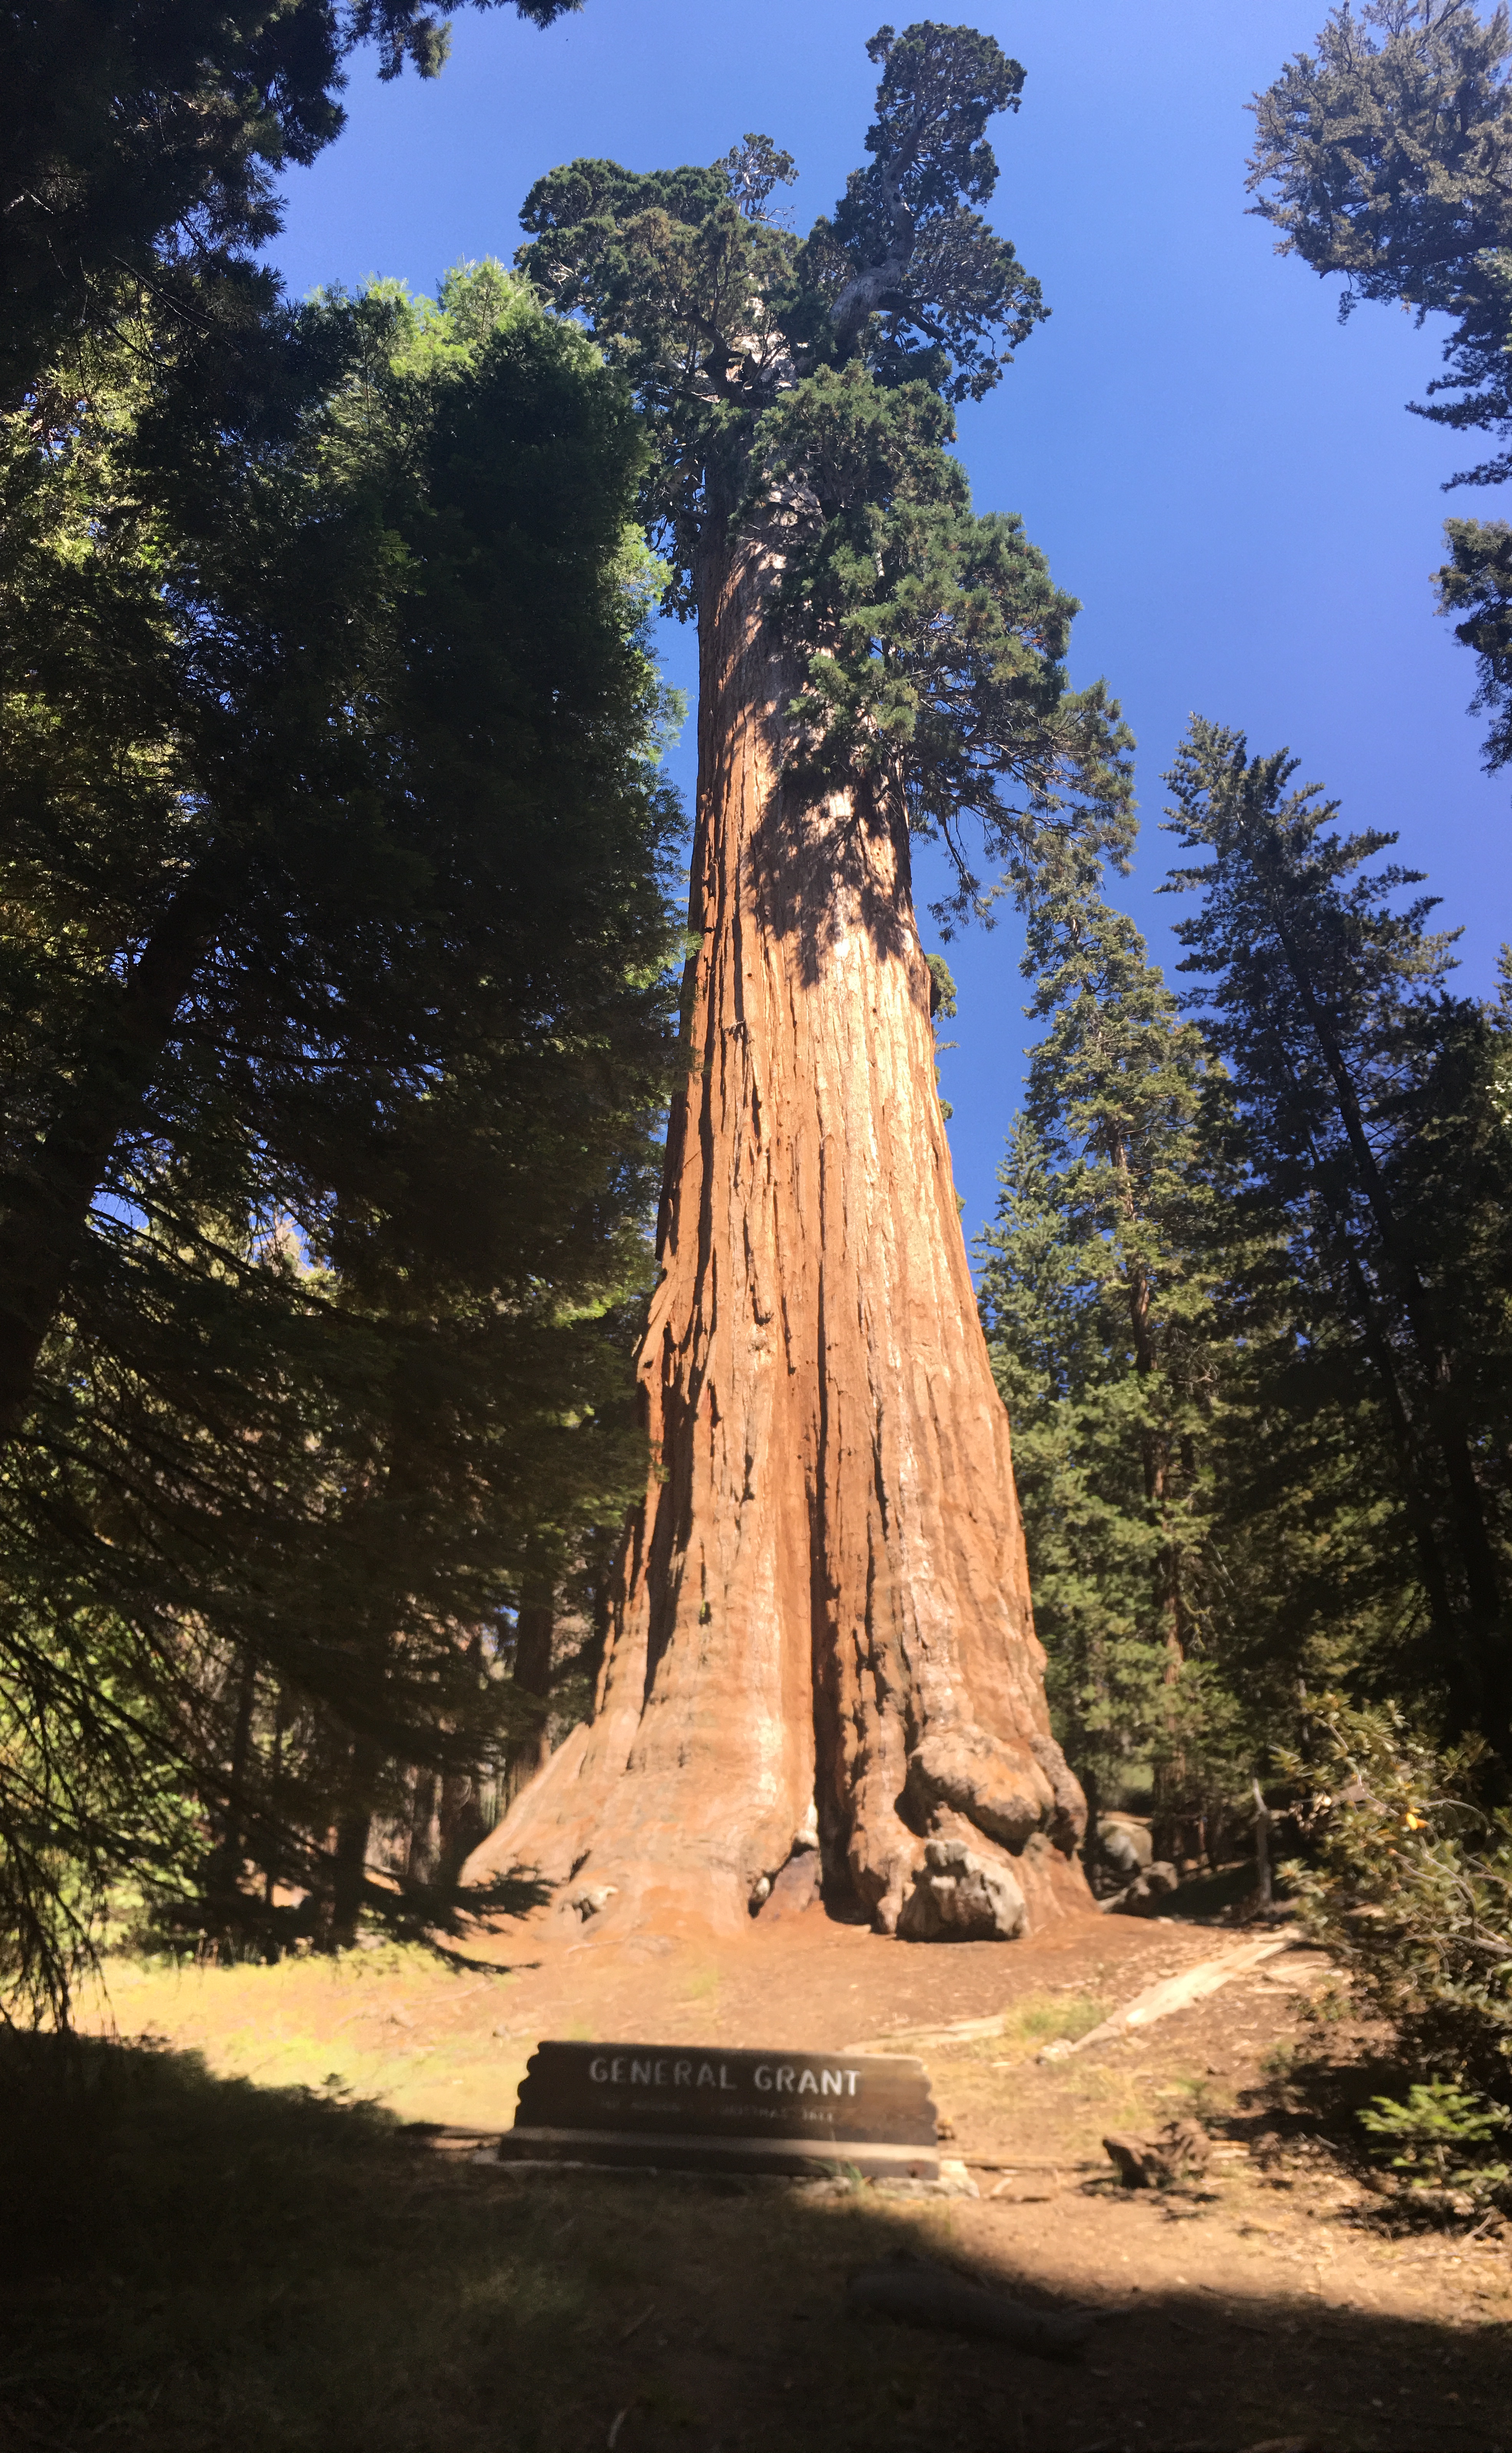
Obligatory tourist picture of this HUGE FUCKING TREE!!!
Note I do not receive any compensation and this is just a review of my experiences on the trail.
What is the Chilkoot Trail?
The Chilkoot Trail is a 53km (33 mile) trail that crosses from Alaska, USA to Northern British Colombia, Canada, just south of the Yukon Territory. You will follow the same path prospectors from the 1890’s followed to head to the gold fields! Tons of historic signage and artifacts along the way. If you are a history buff, or love multi-day treks, this one is for you! Parks Canada Overview
Preparation
The challenging part about planning to hike the Chilkoot Trail is organizing the travel to and from the different trail entry/exit points. Not overly difficult, however some careful planning is required as the trail end point in British Colombia is only accessible by float plane and train. The train does not operate every day, requires pre-booking, and the schedule is such that you will need to start with the exit train and work your way backwards to figure out your start date.
Travel
Being Canadian, I found it easiest to travel to Whitehorse. There is a 2.5 hour flight multiple times a day from Vancouver airport. There is a free airport shuttle at the Yukon airport for each domestic flight that takes travelers to the various hotels. We stayed at the Yukon Inn which has a restaurant on the premise.
WPYR is the company you will work with to sort out your train/bus to Skagway and the train/bus back from Bennett (the terminus of the trail).
Permits
You will need to get a Permit from Parks Canada (this will cover you for both the Canadian and the US side). You will select your camp sites and make the reservation. More info can be found here.
Camp Sites
There are nine campsites along the Chilkoot Trail. Each one has bear bins and toilets, most have tent pads and fully enclosed cook shelters. Most people strategically camp at Sheep Camp, the closest campground before the main pass of the Chilkoot Trail, additionally most people then camp at Happy Camp, the closest campground after the pass. A list of each campsite and the elevation profile and their locations can be found here. We camped at Sheep Camp, Deep Lake, and Bennett.
Gear List
I try to go fairly ultra-light, but since we were going to be on a tent pad I brought my free standing two person tent. In total I weighed in at about 23lbs for my pack, including food and 1L of water. Water is plentiful along the trail. Rain gear is recommended (it rained almost every day on our trip). I did the trip in trail running shoes which I normally hike in if I am not going off trail. Hiking boots are also recommended. Here is my complete gear list.
The Adventure
Traveling to the Trail
We arrived in Whitehorse around 11:30PM and took the free airport shuttle to the Yukon Inn hotel – checked in and slept. The next morning we grabbed breakfast at the Yukon Inn restaurant and walked over to the WPYR bus station office, which is about a 20 minute walk from the hotel. We booked this leg of the journey here (it was hard to find the exact bus/train we needed, but a quick email had us sorted out).
Here we met up with our bus driver and a few others and headed off to Carcross. We had a 30 minute layover in Carcross which is a beautiful little village, we grabbed a coffee from the cafe there and wandered around taking pictures. We will re-visit Carcross on the way back for 4 hours so I will dive deeper into that town later.
Next our bus continued on some way until we switched to train. This train took us all the way to Skagway. It was a scenic train with a narrated guide through the White Pass trail. You can stand outside the car to take pictures and it was truly an enjoyable time!
Once arriving in Skagway, we picked up our permits at the trail office, picked up fuel and bear spray at one of the local hiking shops, grabbed some lunch at Glacial Smoothies and Espresso (10/10 delicious!). Puttered around town, did some last minute grocery store shopping, and had dinner at The Red Onion (old brothel turned restaurant – would rate 4/10, service was good but food was meh).
We then met up with our shuttle driver Anne who was wonderful and drove us to the Dyea campground – her info can be found here. The campground, as of writing, is 10 dollars a night (either Canadian or US which is handy!). We set up our tent, played some cards and hit the hay.
Day 1 – Dyea to Sheep Camp – 15 miles total (with loop and extra from camp)
Photo in front of the trail head – Courtesy of my hiking buddy Ming!
From the campground it is a half mile trail walk through the woods to the Chilkoot Trailhead. We snagged a picture in front of the sign and met up with a girl we met in town the day before. At around 9:30am, off we went towards Sheep Camp. We were warned by the ranger that the first mile of the trail is kind of the worst. If you look at the elevation profile you will see a large hill right off the bat. Sure enough up up up then down down down. It wasn’t too bad overall but I always fine in the first mile of any hike my body is like “what are you doing?! grr this is terrible!?” before it reluctantly goes “oh, I guess my complaining isn’t changing anything – fine I guess this is our life now”. Once that hill was done, we were in the flats. Through wet lands and coastal rain forest it was easy sailing for the first half of the day.
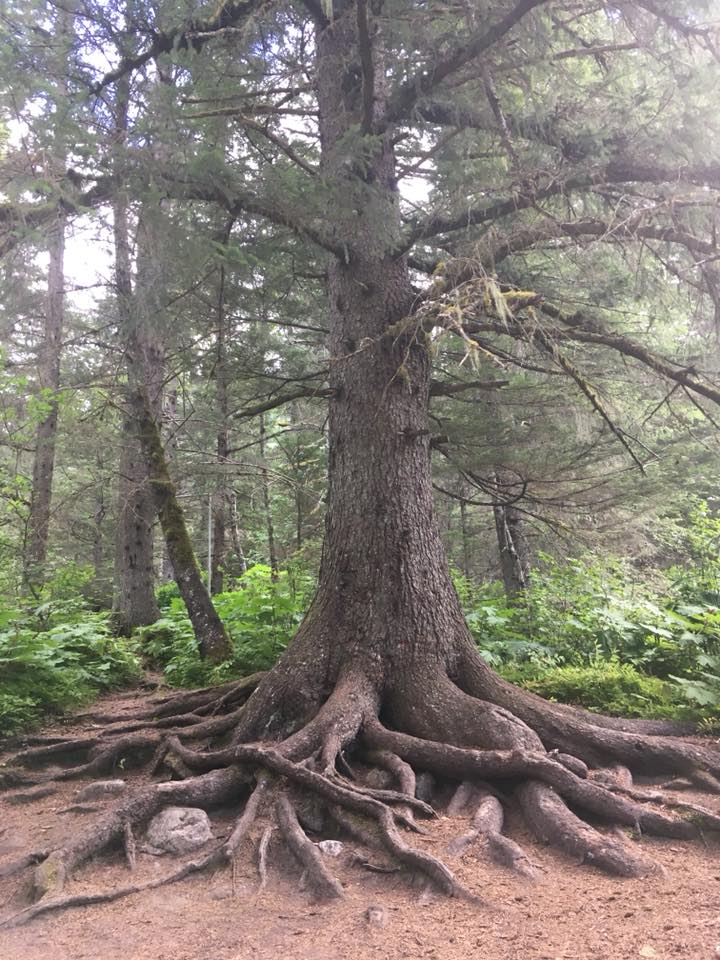
We stopped at Finnegan’s Point for our first snack break. There is a gorgeous old tree here which greets you like a Tree Ent from Lord of The Rings. Onwards we went to Canyon City.
Beautiful tree at Finnegan’s Point
Our next break here was quick, as we wanted to check out the Canyon City Ruins. We hiked across the sketchy suspension bridge and hiked the loop.
NOTE: This was not advertised as a loop and I was wondering if we were going to forever keep hiking away from the main trail (not literally but was questioning the route a bit in my head). Sure enough it loops back to the beginning where the suspension bridge meets the other side of the river.
The overgrowth hid most of what Canyon City Ruins had to offer, but I am happy we checked it out and there were some gorgeous glacier views from a river lookout spot.
We met back with the main trail and kept on hiking! The next section I would say is the worst section of the whole trail. Probably because it was a 13-14 mile day, but this section from Canyon City to Pleasant Camp was less then pleasant! It was rocky and elevated and undulating. I was pretty tired at this point and we sat in a pretty big huff at Pleasant Camp. Last stretch to go we made it to Sheep Camp around 5:30pm- a welcome site that was!
The ranger came around at 7PM to spook us into the trials and tribulations of the upcoming day as well as to share the history of the trail. He said however long it took you to get to Sheep Camp, on average that is how long it will take you to get over the pass to Happy Camp. He asked who was heading further on to Deep Lake and three parties, ours included, raised hands. I was a bit alarmed, realizing many people take multiple days to get to Happy Camp, but I think he was just setting a realistic expectation in that the following day was going to be a tough one!
Day 2 – Sheep Camp to Deep Lake – 10 miles
Funny story about this particular morning. After waking up and leaving my tent , I noticed there was no tents erected on any of the tent pads! Worried I had over slept, I checked my watch and it said 7:30AM. I guess everyone heeded the rangers guidance and set out super early!
Heading to the cook shelter as a few stragglers were just leaving, the only people remaining just so happened to be from the three parties who were heading to Deep Lake camp today (the one beyond Happy Camp). We all laughed among ourselves, joking that us longer mile people just needed our beauty sleep. 🙂
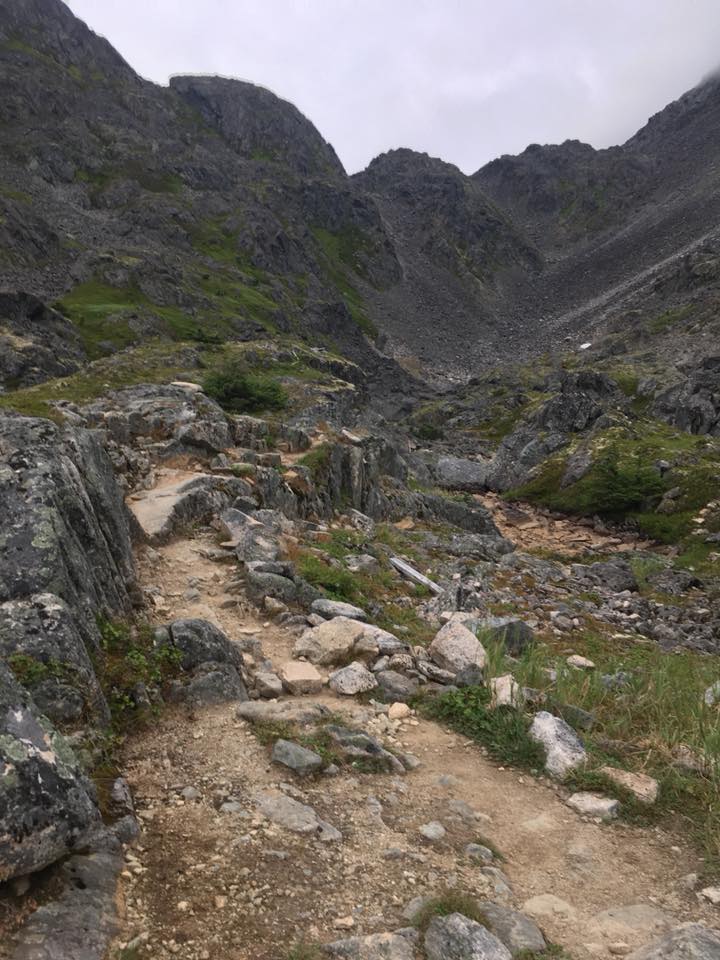
Off we went heading towards the looming pass, up, up, up, meeting some of the other folks from the night before along the way. We started to get above the tree line and that is when the views began to open up. Waterfalls galore! We hike through some stream crossings before heading to the scales. This is where the miners gear was weighed showing they had 1 tonne of goods to enter Canada. Here we could see the pass and a few dots of people hiking it.
That pass dead center top is where we are headed!
The pass was tough but manageable. It was rocky talus and boulder fields, you could hop one to the next. I found the terrain completely fine however the winds were gusting I would guess around 30-40kph, and I found sometimes that unnerved me a bit. However brave children and older folks were doing no problem so I pressed on, not to be outdone.
The top of the pass had some snow patches before the warming hut. We hung out up there for around 45 minutes taking photos and warming up. Finally we began to descend into the Canadian side of the trail.
This side of the trail felt more rugged. Lots of rock fields, water crossings with no rock hopping, cairns to follow. Feet did not stay dry, and I was very grateful I wore trail running shoes and not dry gore-tex boots!
Once we got to Happy Camp it was around 4:30PM. Since there were no cook shelters at Deep Lake, we decided to make Cup of Soup in the cook shelter at Happy Camp. We met up with a few groups who were also going to continue on to Deep Lake. Finally we went off on the last 2.5 miles we needed to finish that day.
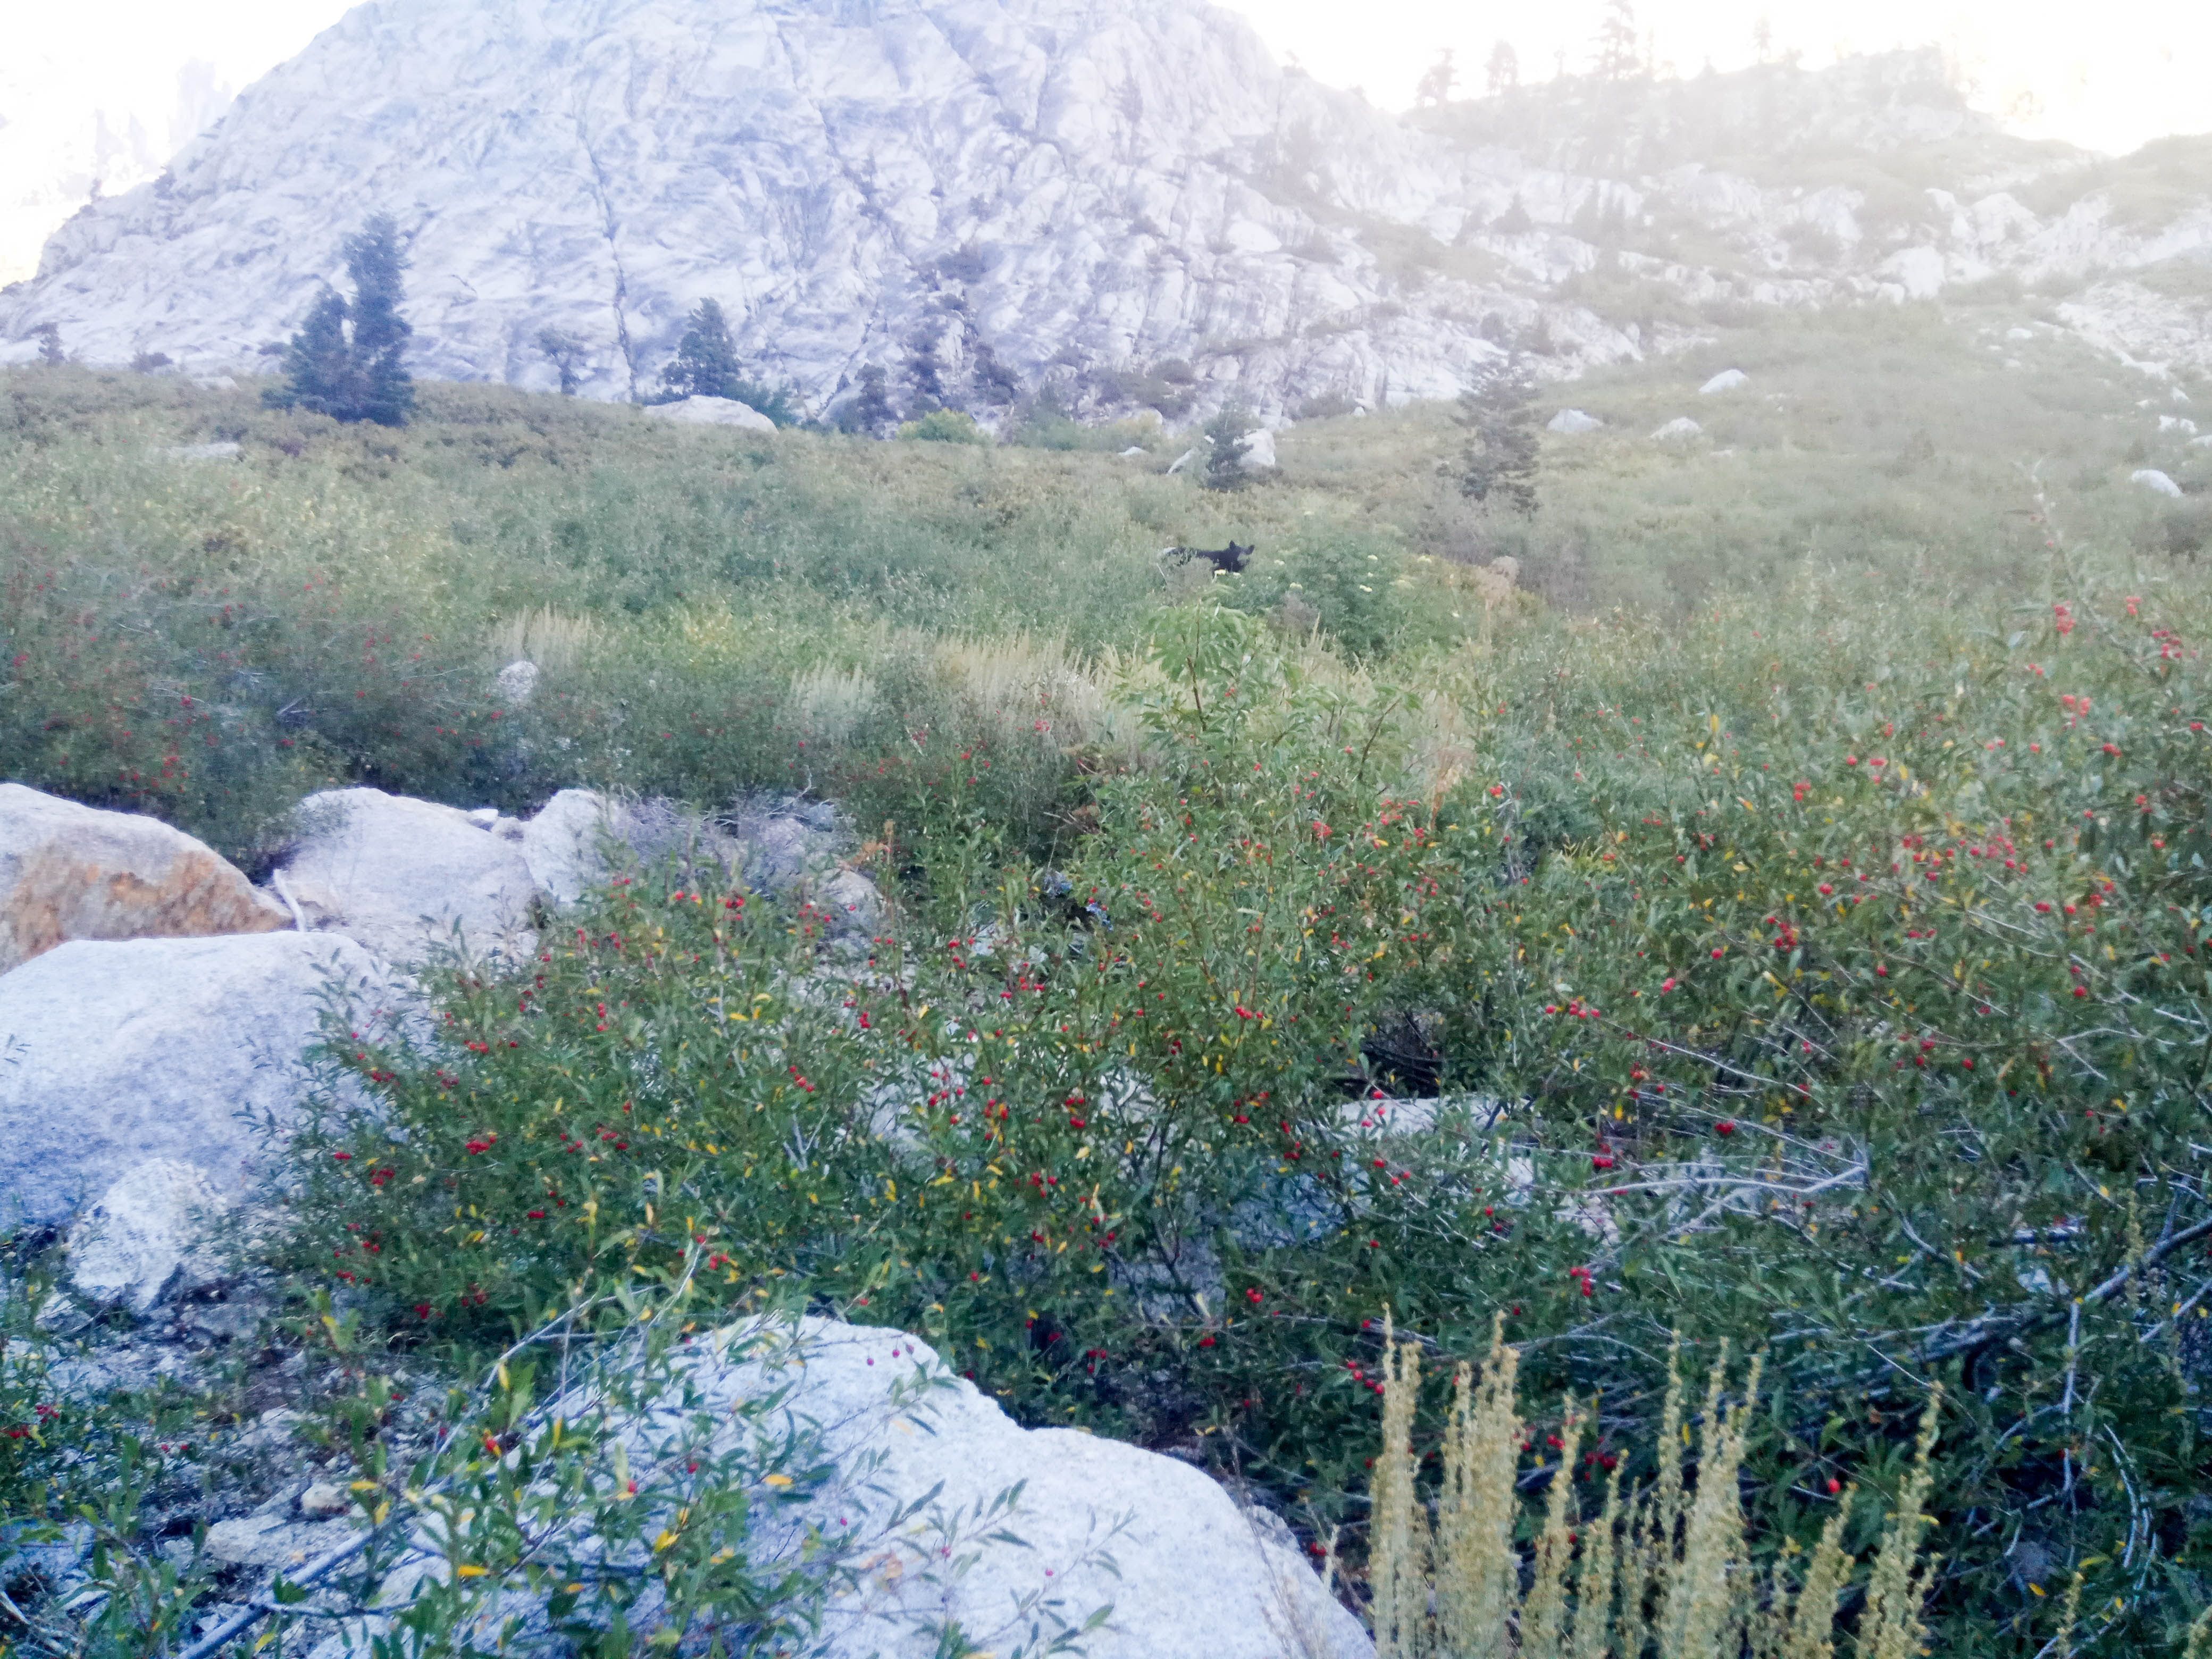
Deep Lake was dreary as we had started to get a fair amount of rain, however it was not without beauty. Wild blueberries and huckleberries abounded. The wind howled most of the night however it was a quiet camp and I am glad we chose to stay there.
Day 3 – Deep Lake to Lake Bennett – 10 miles
Deep Lake to Bennett was a welcome change of pace. There had been a bear restriction so we had to travel in groups of four between Deep Lake and Linderman City. We sat by the junction nomming on wild blueberries until some travelers from Happy Camp strolled by. Sticking out our thumbs, we got in line and started marching along behind.
Taking a break at Linderman, we checked out the interpretive tent, had a morning snack, and picked up our trail completion certificate. There we met a Canadian ranger who said the bear restriction is now lifted so we slowly peeled out of camp one by one and headed off.
This section of the trail takes you back into the woods and the views are a bit bland (in the grand scheme of things). Marching along up and down rock/trail until you finally get to Bare Loon Lake. This camp site is gorgeous and overlooks a lovely lake. Many people stay here for their final night and it is not without merit.
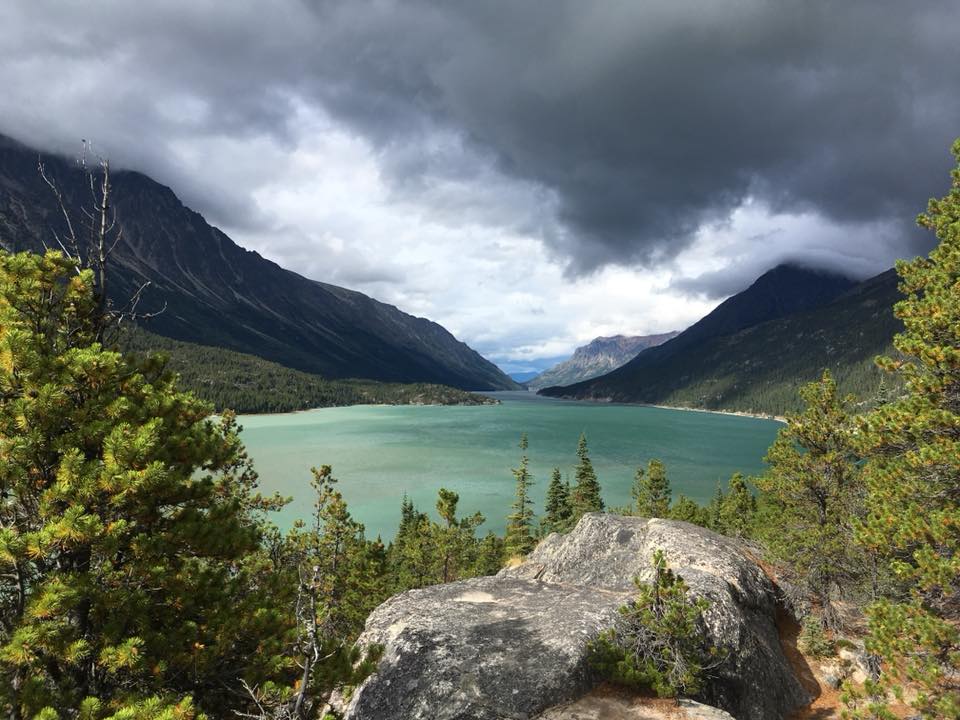
We chose Bennett Lake to stay our final night so off we went. The final stretch of the trail hits sand – lots of sand! Makes for an odd final slog but the views are stunning.
Finally you get to a panoramic sign and hop up on some rocks – be sure you do because wow!
Overlooking Lake Bennett
Traveling Home
Taking the train out of Bennett was straight forward, as it is a few minutes walk from the camp sites. They put all the stinky hikers together in one car, the sight seers are in the other cars.
Travelling back to Carcross we had a four hour layover before bussing to Whitehorse. Here we went to The Bistro (10/10 busy but food was great), which had a fantastic poutine and some great local beers on tap including a nice Kolsch! Here we did some shopping – there are many local First Nation artists with gorgeous and reasonably priced hand made items. I found the shopping here to be much more unique and less expensive then in Skagway. After our layover, we hopped onto the bus and back to Whitehorse.
Once back at WPYR bus station, we walked over to the Yukon Inn and cleaned up and grabbed dinner. Great success! We donated our bear spray to the front desk to give to any other hikers who may want some.
The Recap
Overall, easily doable trail if you are in shape and train on some mountains/hills/stairs. I met an amazing gentleman from Tasmania of the spry age of 72 who completed it. He found the going tough and had a much more paced itinerary then ours, but mission complete! Trail runners can complete this trail in one day, though that sounds like it would be hella tough and not sure how logistics would work. Going solo is fine, you will meet lots of people each night if you want to. We didn’t see any bears, though lots of bear poop!
Note I have revisited this trip in 2018 a Medium SEKI loop post here! Please use that one as it is more updated and detailed:) I recommend reading it to plan your camp sites as it follows the same route as over half the Big SEKI Loop!
This has been a real tetris of an endeavour. How do I fit 12 days of crap in a bag that is only designed for maximum 30-35lbs. Last time I checked, I eat a lot of food in 12 days! Now I have to add a shelter, clothing, toiletries, sleep system, cook system, fuel, water, first aid – oh my!
I spent a lot of time tinkering for this particular trip. Weekend trips are easy… if it’s under 10lbs without water it’s light! But I turned into a total gram weenie and measured *everything*. I even cut all the tags off of everything… it’s kind of embarrassing. The very first day of this trip is just over 5000ft gain to get to the lip before you drop into Granite Basin. I really didn’t want to lug up anything unnecessary with a full load and 12 days of food.
This is heavy and since I am traveling alone unnecessary but I love free standing tents at this point in my backpacking life, and I cannot afford a super ultralight silnylon anything 😦
A very handy guide that is itemized and a fantastic planning website: https://lighterpack.com/r/fx7a4j (NOTE: I am re-planning this trip so it’s been updated with lighter gear as I am expanding my collection!!!)
The Adventure
I flew into Fresno, met up with a friend for some pizza and a beer, then rented my car out to Roads End. I arrived in the dark which was a bit overwhelming as I was by myself – not quite sure where to park, getting turned around in the camp ground. I stayed at the Sentinel camp ground out there which was super rowdy. I actually got no sleep even with ear plugs. I set up my tent but spent a few hours sleeping in the back seat of my rental car as it was a bit more sound proof. There was a fight in the tent across from me resulting in an altercation and I believe some folks were arrested. Wasn’t a great night overall.
Next morning I met a lovely woman I had been chatting with on forums. We agreed to start the journey together in a non-committal way that we weren’t required to stick together, and see how it would go. I am always a bit socially awkward and nervous meeting new people, but she has a lovely sense of humour and we were both super nervously excited for our upcoming journey. She was awesome and even rented my bear can ahead of time, picked up my fuel (as you cannot fly with isobutane) and got some beta the day before from a ranger. We synced our inreaches so we could communicate and off we went.
Roads End Trailhead, Cedar Grove – 5035ft – mile 0
Day 1 – Setting forth:
Day one began after we finally introduced ourselves to eachother, we hurried over to the rangers station at 9am, got our permits, briefed ourselves with the ranger, then parked at Road’s End. I was a bit apprehensive as my pack was super full and heavy and I knew we had this looming 5000ft climb ahead of us with over 40 switch backs. We started out and it was very grueling, but fortunately we were just getting to know each other so lots of conversation helped ease the suffering. Danielle is the strongest most power house woman I have ever met, in both body and mind. We clicked pretty much instantly and it was a match made to hike.
We reached just before Granite Lake junction about 10.5 miles, and set up our tent on some granite just past a water source. We got to see what we thought was a good “bear distance” away from our tents for our bear cans, cook dinner, laugh and watch a beautiful horse and mule train go by during dusk. Exhausted, accomplished, and happy!
Day 2 – A day of blunders:
Granite Pass 10673 Mile 11.2
Next Day I really wanted to make Simpson Meadow as the time line for the loops was a bit aggressive. We headed out in high spirits and over Granite Pass. Was nice and early in the day so energy was high and the views were grand. Descending Granite past Lake of the Fallen Moon area was gorgeous and almost fairy tale. Getting into some of the granite there was a bit apprehensive as it was easy to lose the trail for a few moments. Being my first time in the area that would always get my heart rate up a bit.
Coming down over Granite Pass these gorgeous meadows appeared.
We headed past this one area where you were supposed to cross the creek (in hind sight). We stayed the left, on the wrong side of the creek as the trail was not easy to follow and a spur trail continued on, resulting in an hour of us bumbling about trying to read our Inreach/Map/Compass, though it’s a gorgeous area for a camp site when I go again! I think this was around the East Fork Doughtery Creek. We finally back tracked and crossed this creek the correct way and started heading up, we were a bit miffed that we had made such a blunder but we were happy to be on track. About half a mile from the creek we checked our map and realized that was the last water source for a few miles so we had to back track to refill – even more miffed!
We headed up and up and then finally started our big drop into Simpson Meadow. It was already getting late and Danielle being the powerhouse ninja that she is, excelled on the down hill trek. So we agreed off she would go, and I would meet her at the junction. Little did we realize, dropping almost 4000ft would take longer then we would anticipate. Almost an hour and a half later as the light was growing thin we met up. We were both very tired as we had trekked 12 miles, our packs still very heavy with the full load (and remember our one hour bush-wacking wrong turn endeavour)!? We were a bit worn thin but found this super cute meadow next to a creek and hunkered down. Had a good laugh and patted ourselves on the back for being strong and capable, and went to sleep. Mile 22 – 5990ft
Just past Simpson Meadow Jct.
Day 3 – Why Hello Mr. Bear:
Heading Up Middle Fork Kings River
Day 3 was our “easy” day. Lots of miles but not crazy elevation. We set out from Simpson’s Meadow, walking about half a mile further from our camp ground we found some even choicer camp grounds (fire rings, flat, shaded) – little did we know we would utilize them on the return trip… Our goal today was to reach the JMT! We headed out in great weather. We were in some open areas that were nice and warm after Simpson’s Meadow, with great water sources, we spent an hour having a “bath”, drying out, and just in general soaking up the sun. Once we were well rested we continued on past Cartridge Creek over a wooden bridge up towards Devil’s Washbowl. We sat there for some time taking pictures of the beautiful river carving through the granite. Here we saw two other travelers, our first since Day 1 and had a lovely chat.
Walking farther up the canyon, we saw our first bear! It was getting close to dusk and our pace was hurried (there is no good camping spots from Cartridge Creek up just before the JMT junction). You could camp at Devil’s Washbowl but it really isn’t ideal. Mr. Bear was happily munching on some berries about 30 minutes from the river crossing just before the JMT. We yelled and made a lot of noise he sauntered off a few meters and we continued on. It was exhilarating and nerve wracking meeting a bear as we had felt pretty alone, but he was so at ease in his habitat.
Danielle captured Mr. Bear! About 1.5 miles before the Palisade Creek Crossing
We trekked on for about 30 minutes and decided to camp just off trail. We were about 15 minutes from the water crossing (in hind sight just push to the water crossing there is a good camp sight just before it). We had good access to water but camped on granite. Mr. Bear did not bother us that night. Just Before JMT – 30 miles – 7800ft
Day 4 – Welcome back to ‘civilization’:
First thing in the morning we packed up and knew we were about to hit the *looming* Palisade Creek crossing. This crossing had been deemed “unpassable” by the rangers just weeks before we headed out, due to the huge snow pack of 2017. It was late September now and just was deemed passable. It was scary. I removed my insoles and put my hiking boots back on. Untied my pack and slowly shimmied across the river/creek. It was mid thigh in the deepest section (I am 5’6) and boy was it strong. The scariest part is that the water was so turbulent that I couldn’t see the bottom to check the footing. Shuffling side to side and moving my hiking poles so I always had three sturdy points of contact was helpful – facing upstream as I went. Even moving the poles I could feel the strong rush of the current. Danielle and I shouted encouragement to each other as we crossed. We were successful and had some huge spikes of adrenaline.
It really looks so innocent in this picture with the sun shimmering… but it was up to my mid thigh in the middle!
Lots of laughing and I might have even had a tear of joy. I know we both faced a lot of fear doing that crossing and we were cautious and extremely proud in our success! I think it made us even closer as a duo as shared experiences can often do.
We finally hit the JMT!
Hitting the JMT was almost a smack back into the world. Within about 10 minutes of hitting the JMT we met probably 8 people. In 3 days on the Copper Creek Trail we met 3. It was very jarring! Onward we trekked up to Palisade Lake. Up Up Up Up Up! The first 5 miles were really relaxing through open sections and forest following Palisade Creek. The last 2 miles were a bit “staircase-y”. We met some packers with horses and mules and some folks studying the mule’s and horse’s grazing habits – super chatty and nice to talk to some folks. We set up camp near Palisade Lake and chatted up those folks before the pass. Enjoying the last bit of sun I wore flip flops and warmed up on the granite. 40miles – 10000ft
Following the creep up towards Palisade Lakes
Day 5 – Am I back in Canada?:
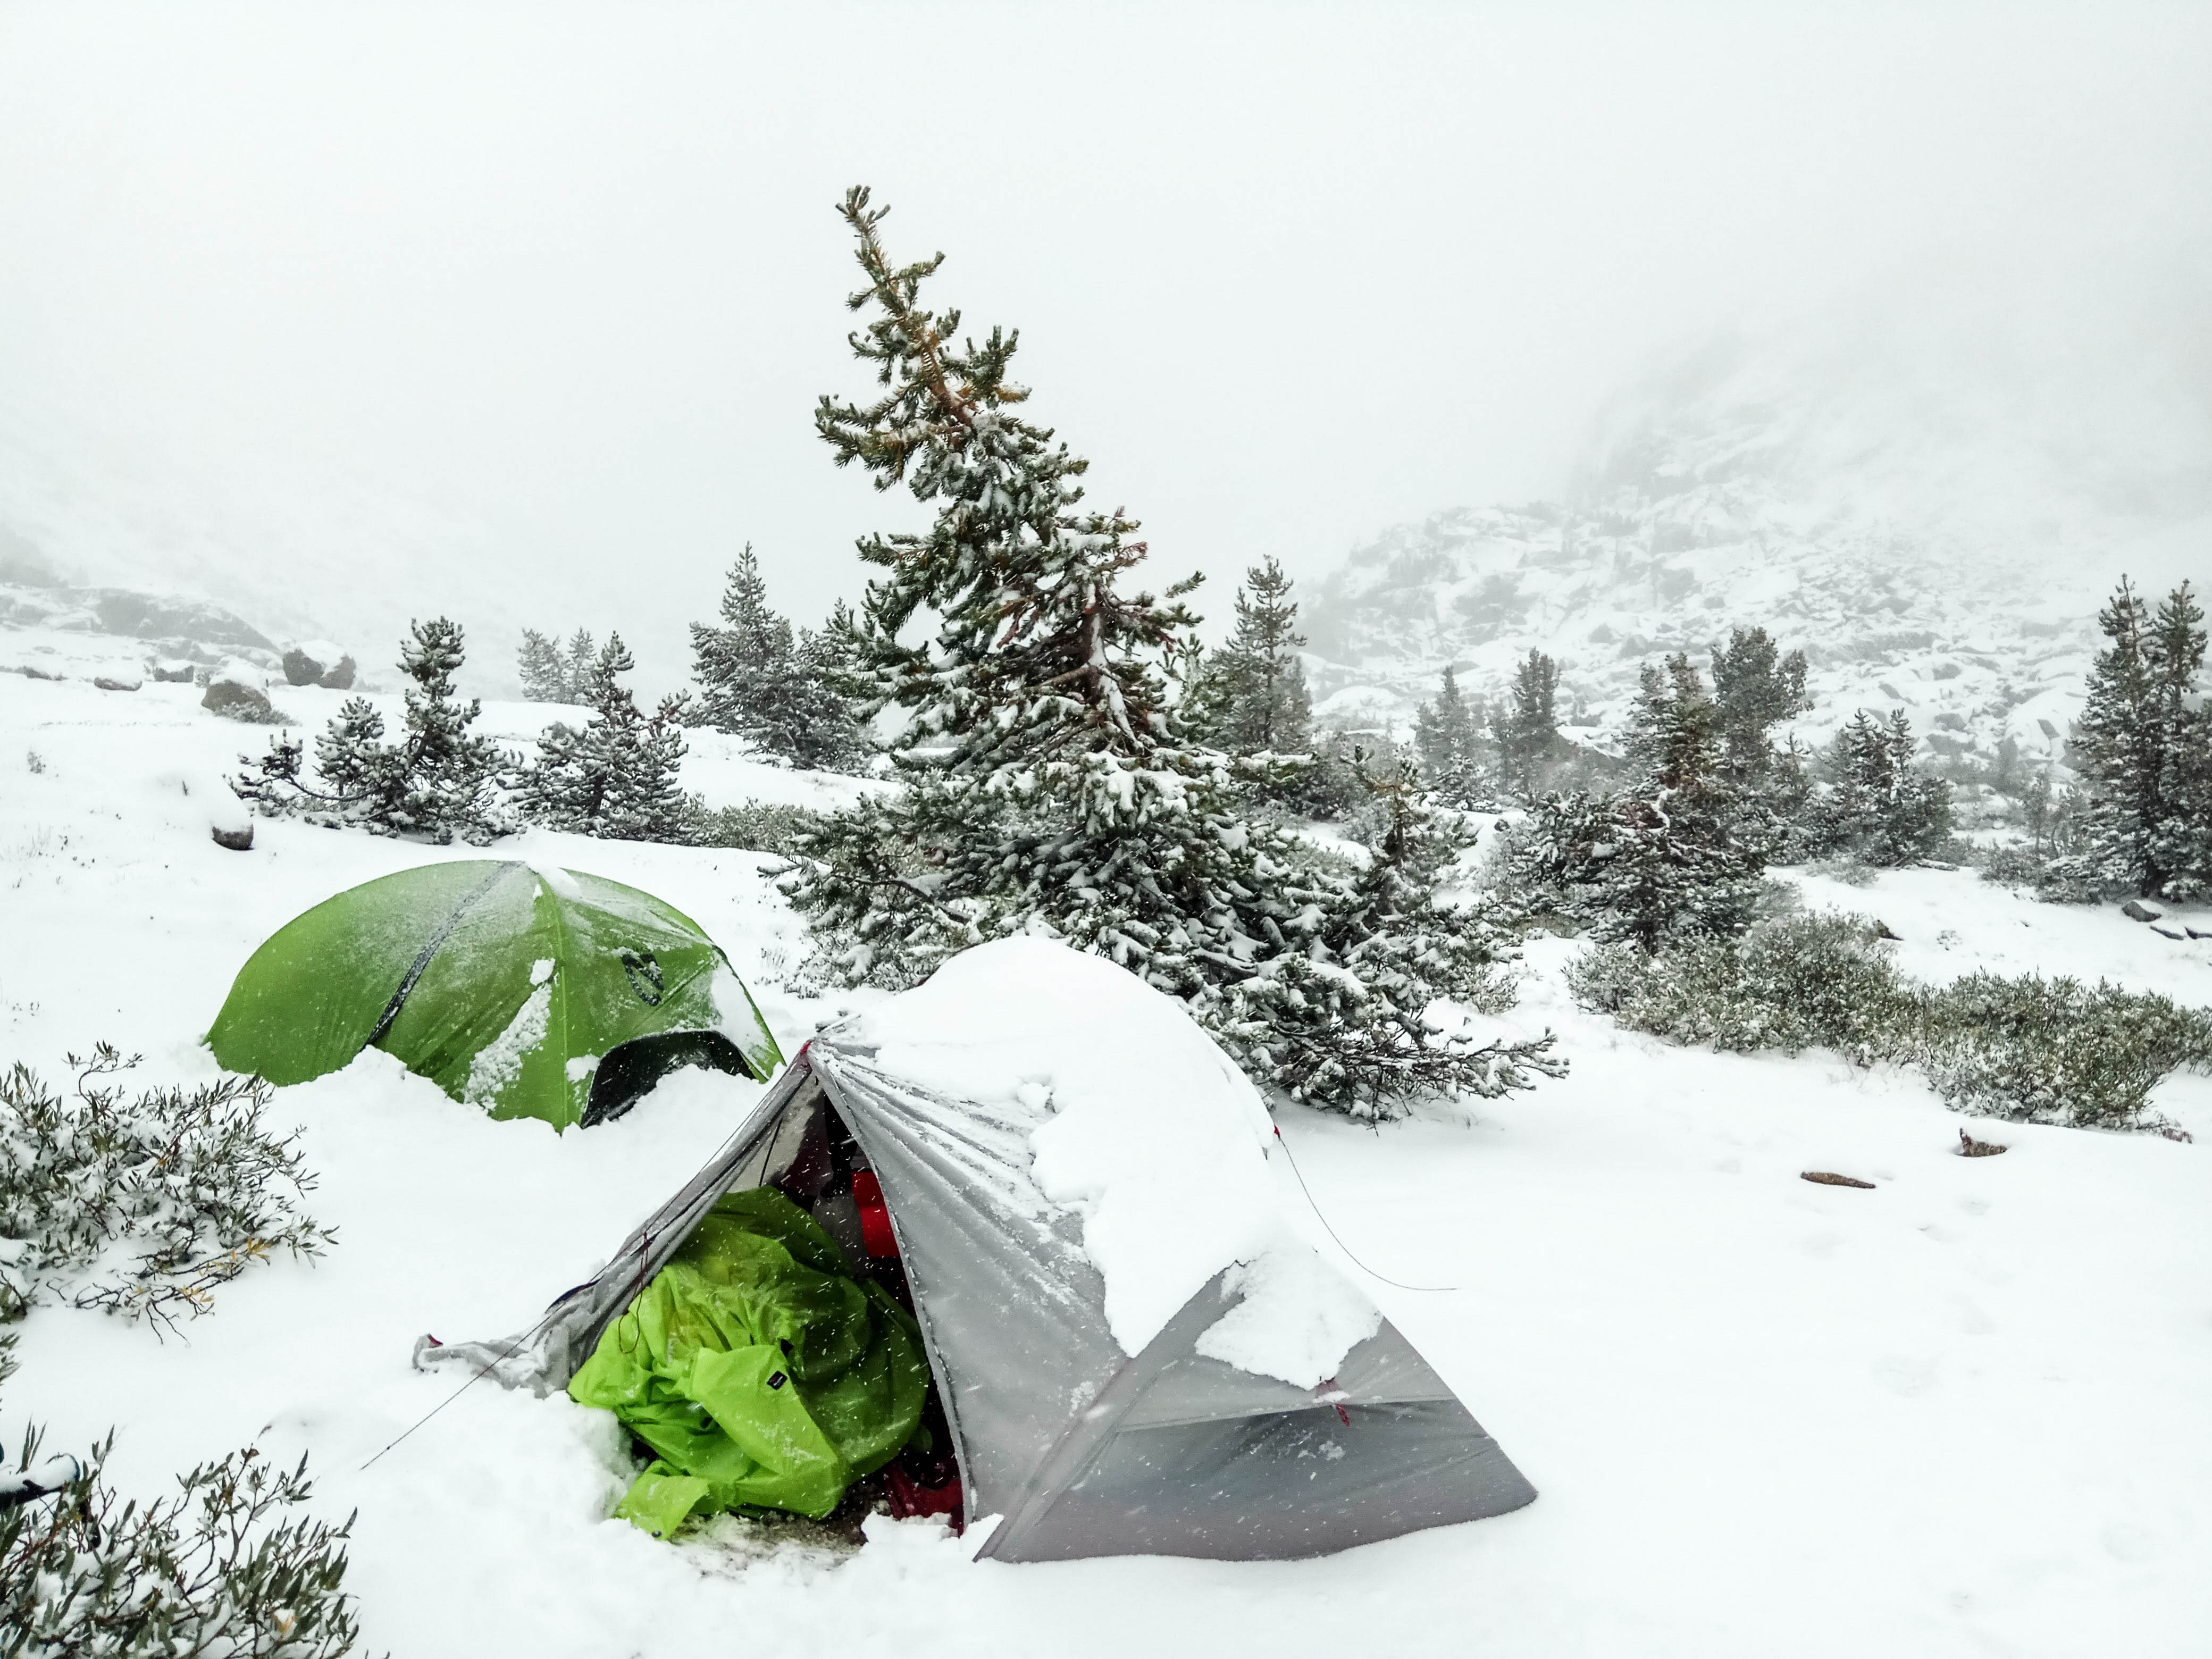
Uh what month is this?!
My tent has a ton of snow on it WTF?!? Where did this flip flop weather go? Fetch weather on the Inreach – ensue disappointment with the results. Some hikers were going on, some were turning back, packers were waiting, I wasn’t feeling too optimistic with the weather results. In hindsight we could have just kept going or hunkered down, but that is what hindsight is all about. Knowing our 12000’er Mathers Pass was right in front of us going into a blizzard felt like a ‘poor life choice’. I made the decision to turn back and Danielle agreed with me. We were already sleeping on the cooler side at nights, and knowing between Mathers and Pinchot there weren’t any bail out options we were worried if it got worse before it got better we would be in for a crappy time. A bit of sadness and some repetitive reassurance we were making good choices, we headed down.
We had a hard time following the trail down as it was covered in a lot of snow. The first 1.5 hours was a struggle, not quite white out conditions, hard to follow trail (even having walked it the day before so having somewhat of an advantage). We came across a PCT’er who had yoyo-ed to finish her final section. She had 20 odd miles to go but was hunkered in a tarp tent looking very dejected and ill-prepared for the weather change. We offered her snacks and said to play it safe – I hope she finished.
We boogied back down to Palisade Creek feeling a bit sad but talking ourselves up in having made the best choice with the knowledge at hand, knowing we could sleep easy having made the “safe” choice, we were still a bit cold and damp. We decided to cross Palisade Creek that day, it was slightly higher then it was the day before due to the snow fall but a) we were tired and just wanted to get it over with and b) I was worried the recent snow fall would make it even higher over night. Harrowing but successful. I know my husband was happy to get my Inreach message, and agreed it was a good call. We camped just on the other side of the creek in the woods and snow fell on us that night at Palisade Creek junction, such a juxtaposition to the night before! 51miles – 8000ft
Day 6 – Drying out:
Woke up to frost, my boots were still frozen from the creek crossing. We hiked down the towards the washbowl and saw Mr. Bear again! Hey Mr. Bear! Decent spirits and having been over the terrain already, life was great despite the few inches of snow on everything! After a few miles the over grown bushes had sagged over the trail and we could no longer see where were going (despite knowing down via the canyon along the river). We ended up getting up on a boulder field and slogging over it, literally climbing through and over the saggy bushes til we met up with the trail again, about a 30 minute detour. My anxiety/alertness was up during this time, any time the trail is lost I feel a bit on edge especially when it is dense, despite knowing the direction I needed to head and having many tools at my finger tips, there is something soothing about following a trodden foot path.
Back on the trail we boogied as it warmed up lower and lower. Time to dry out all our gear!
Danielle keeping toasty and basking in the sun!
We got through Simpson Meadow and back to our area with the bitchin’ camp ground. A fire ring was there, we shall make fire!
Danielle made an amazing fire and it was so nice to truly dry out all our gear. Also nice to have the smell of camp fire my clothes instead of hiker stink. This was the best sleep I had at all the camp sights so far. We shared some whiskey she brought and looked back on our journey thus far. Simpsons Meadow – 59miles – 5990ft
Day 7 – Winding down and a bit of homesickness:
Well rested and ready to go we headed out. Up that stupid switch back section was grueling. I am the uphill queen so I headed off to find myself on the 30-40 switch backs up up up. I had a bit of a nap at the top as we met up for a mid morning pre-lunch. Getting over the hump towards that creek crossing where we got lost on the way in. This time we decided to make a little arrow out of sticks in case anyone else was going the other way, so they would not get lost :).
Simpsons Meadow
As we headed towards Granite Pass through lake of the fallen moon we were both getting pretty tired. We saw this meadow open up to us in the evening sun light. It called to us to make a camp sight, we happily obliged. I was feeling a bit homesick for some reason, maybe a bit sadness I wasn’t doing my original plan, and maybe just being lost in my head despite the excellent company. Was a bit of a down day (no pun intended), but some gorgeous highlights. 69 miles – 8500ft (guestimate)
This meadow was perfect and out of the cold trees!
Day 8 – Homeward Bound:
Spirits were very high as we knew we had a good chance of hitting civilization ie. a shower today. We first scrambled over Granite Pass (and a nice long pit stop here for some photos and contemplating what we had accomplished). Past Charlotte Lake then up one last time before our final switch back hell towards Roads End.
Granite Pass looking a bit different this go around
As I am much slower on the down hill terrain, this welcome message from Danielle at like switch back 25 was a welcome surprise.
We popped back out into civilization and I remembered I had some Buffalo Bleu chips in the bear can I left in the bear locker!
Woo hoo! 81 miles – 5035ft
We returned our bear cans and took off to find a shower. Feeling about as clean as pretty gross NPS showers can make you feel, I said good bye to my new forever friend. We had such an amazing adventure together, and to go from strangers to having such a profound experience, I will be forever grateful.
Was it what I had intended? No. Was it amazing? Yes. Did I learn a lot? Yes. Did I make friends? Definitely! Will I be back again? You betchya!
I know this overview was very light-hearted, if you actually want further details or specifics just hit me up in the comments or contact page!
I drove back to Fresno and met up with my good friends to have some amazing tacos at Ophelia’s (highly recommend for cheap fantastic post-hike mexican food!). I then drove to Mountain View to spend the last few days of my original itinerary to spend with some friends there <3. I had an amazing trip and cannot wait to try the Big Sexy Loop 2.0!!!


")